|
How do I set up Audience Optimization for Google Ads?
Before you get started, you'll want to make sure you've completed your Campaigns tracking setup.
There’s just a few steps to set up Audience Optimization for Google, and if you’re familiar with the Google Ads interface it shouldn’t take long at all …
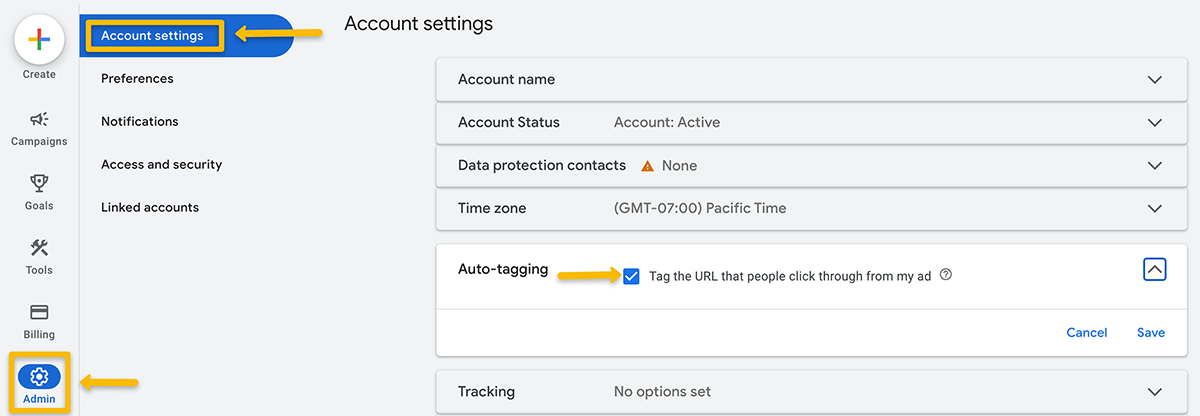
Step 1 - Ensure that you have auto-tagging enabled
Before you get started, make sure that you have auto-tagging turned on in your Google Ads account by going to Admin > Account Settings and checking the “Auto-tagging” box:
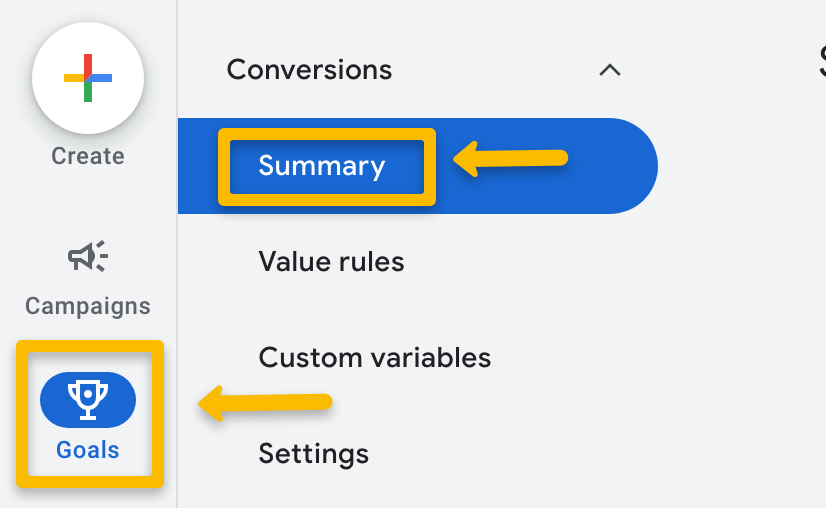
Step 2 - Create a New Google Ads Conversion Action (or as many as you want!)
While you can use any of your existing Conversion Actions, they are almost certainly “polluted” with bad data. We strongly recommend you create new Conversion Actions for use with ClickMagick.
To do so, head over to your Google Ads account, click on “Goals”, and select “Summary”:
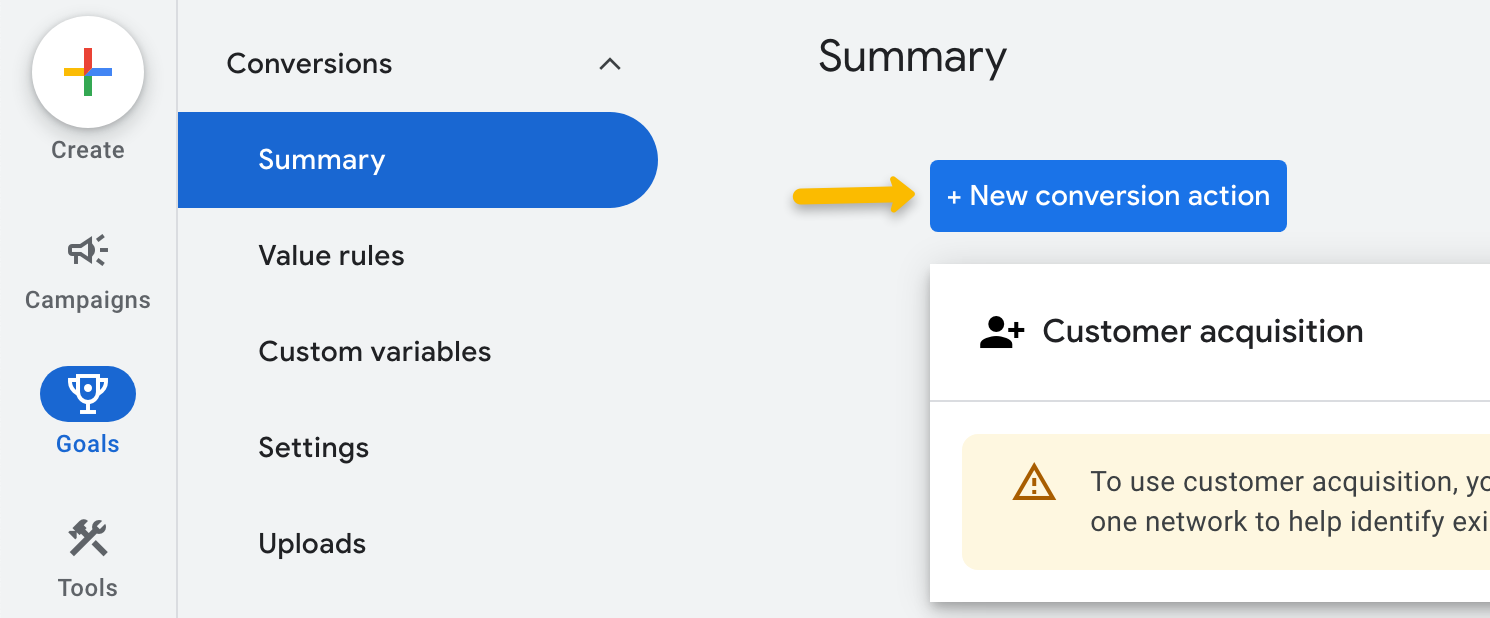
Click the "+ New conversion action” button:
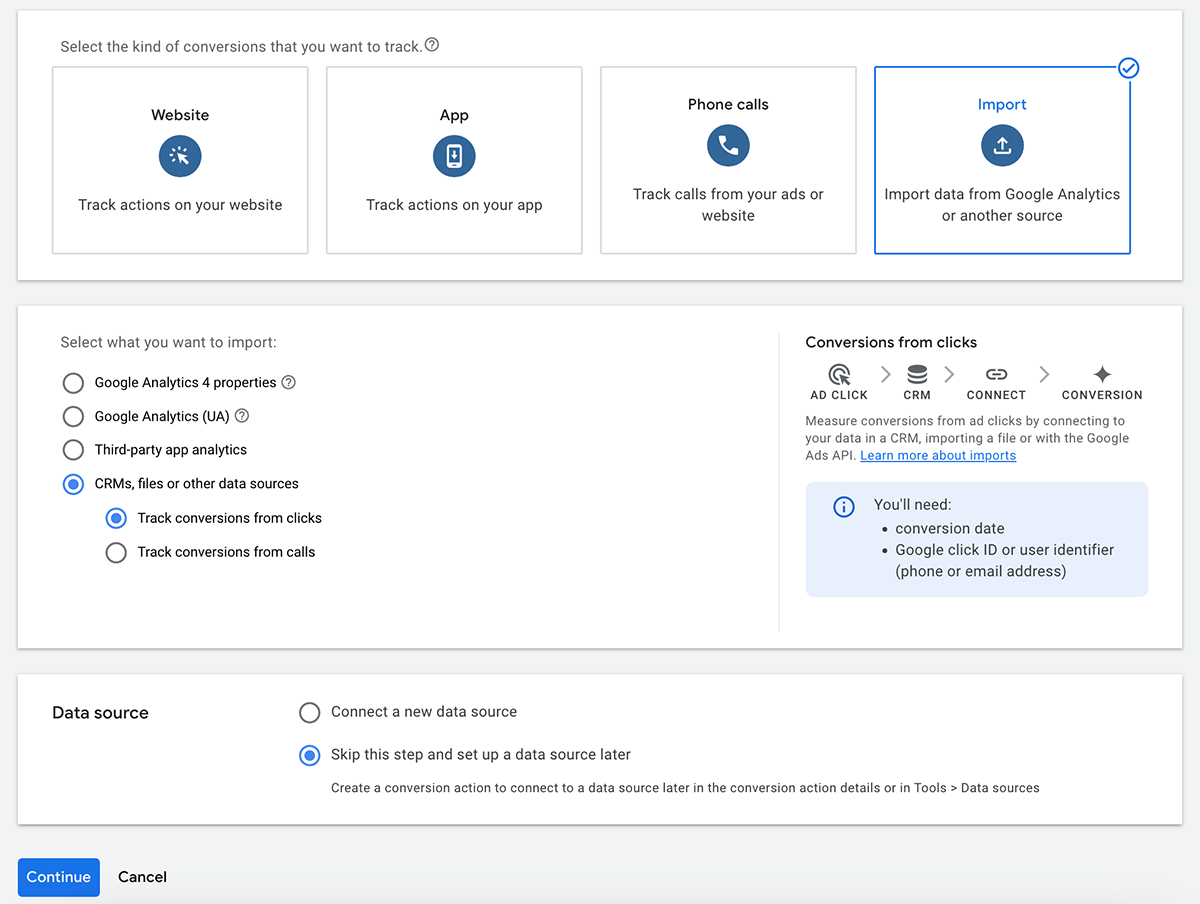
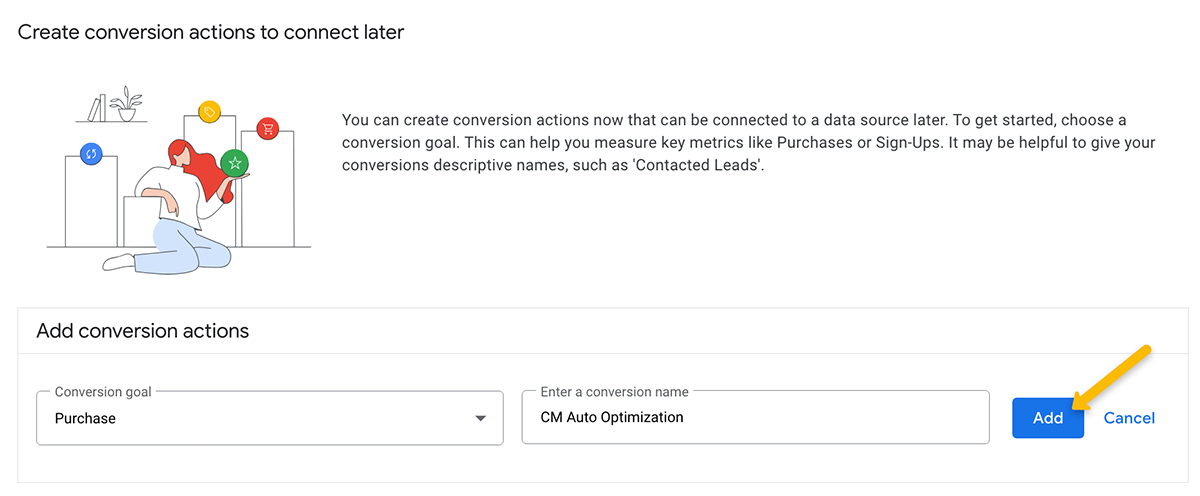
Select “Import” from the conversion type, click on “CRMs, files or other data sources”, select “Track conversions from clicks”, then click on “Skip this step and set up a data source later”. After that, hit “Continue”:
Fill in the details for your new conversion action …
If you want to change any settings for your new conversion action, click on “Settings”, then “Conversion action settings”. In most cases, the default settings are fine, however if you’re a performance marketer and don’t want conversions spread across multiple ads, choose “Last Click” as your “Attribution” setting.
Note: Unless you have a specific reason for doing so, always set the “Count” setting to “Every” instead of “One”. iOS (wbraid) conversions cannot be uploaded to Conversion Actions set to “One”.
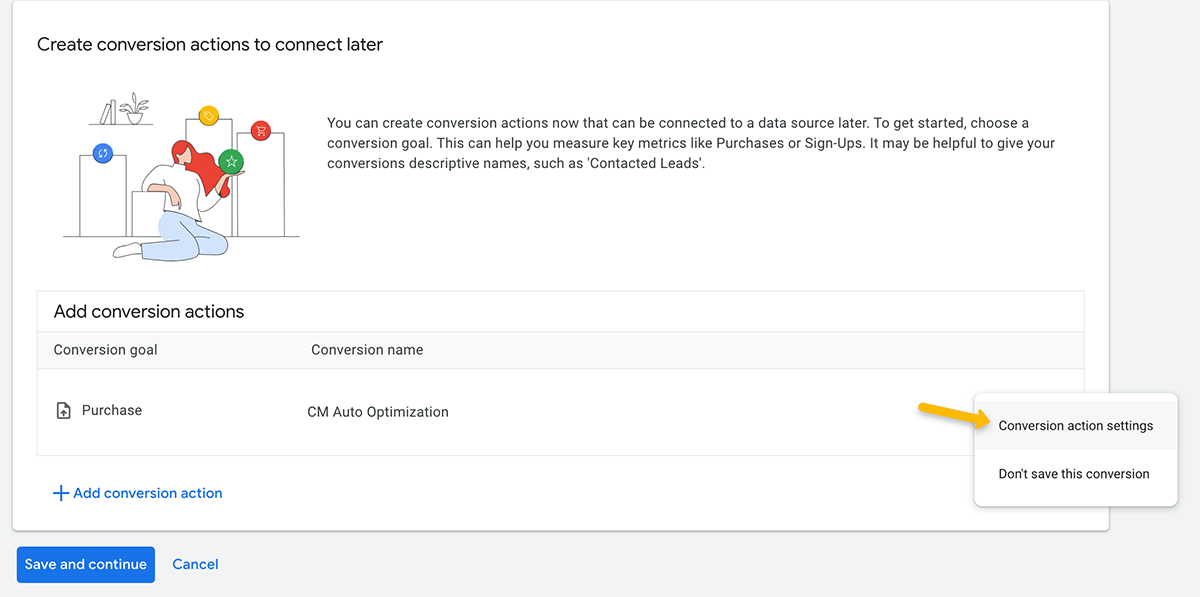
After that, just click on “Save and continue” and you're done creating your new conversion action!
Note: After you create this new Google Conversion Action, it can take up to 4 hours to become active and available. It may show as “Inactive” in Google, but it will become active when you send your first conversion to it.
Step 3 - Integrate your Google Ads account with ClickMagick
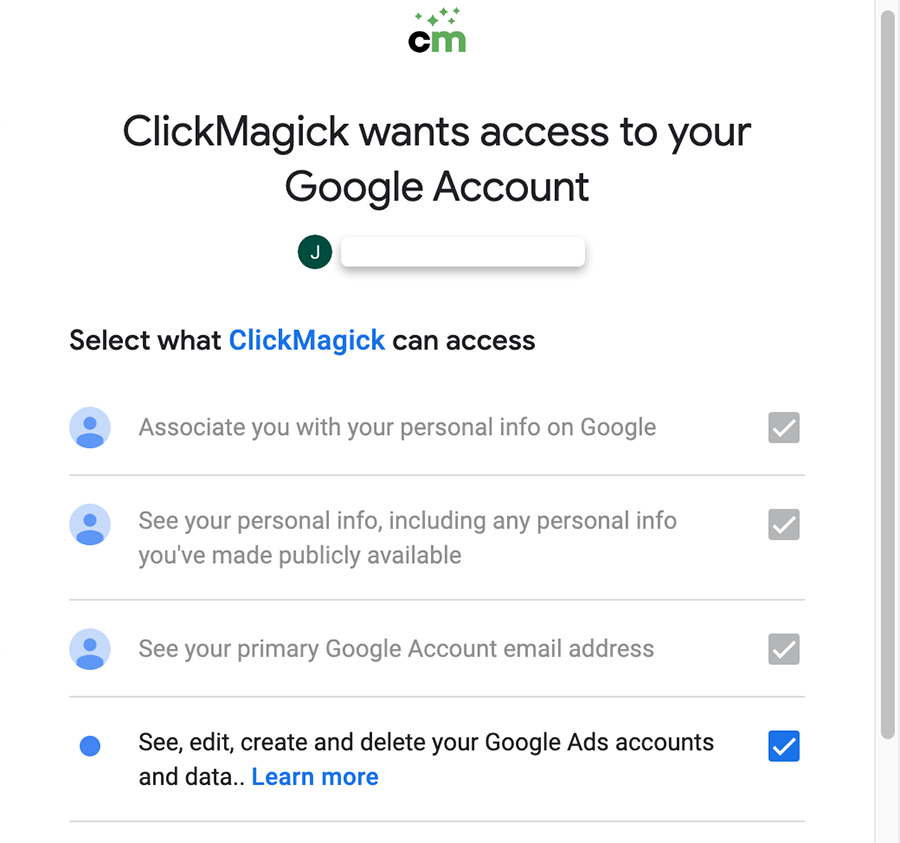
You can integrate your Google Ads account from the Integrations page, available under the Account menu at the top of any page. Once there, click on “Sign In With Google” and sign in to the Google account that contains your ad accounts. Make sure to check all four boxes as shown below.
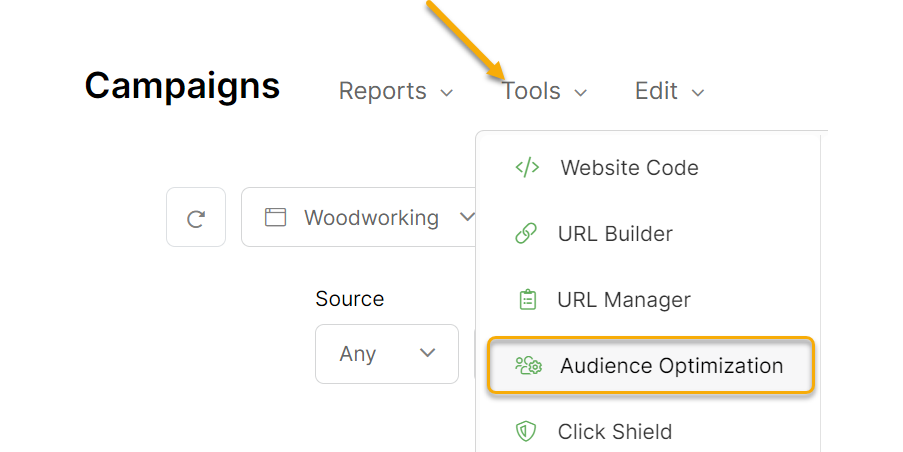
Then head to Audience Optimization from the Tools Menu on the Campaigns Page:
Select the Google Ads tab, switch Enabled to “Yes,” and the Default Conversion Action window will pop up (if this is the first time configuring the automatic configuration):
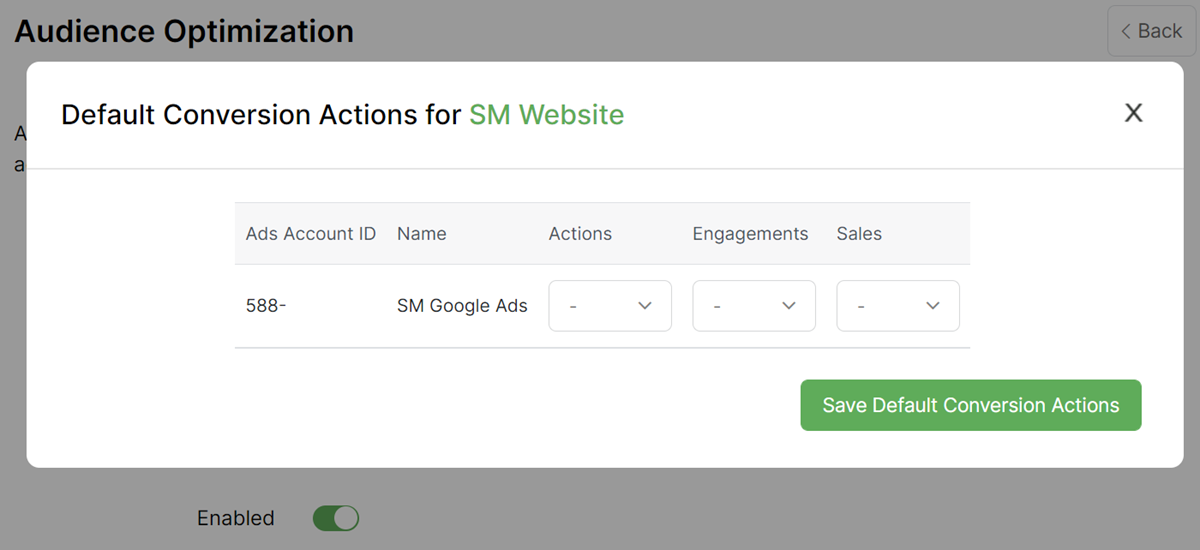
Note: You must configure at least one Default Conversion Action to keep Audience Optimization active. See the ERRORS tab in this article for more information.
Most users generally want to optimize for Sales, so if that’s the case, select the Conversion Action you want in the Sales column, hit Save, and that’s all there is to it.
But know that you can also separately create and optimize for other things like Opt-Ins. If you do, select the appropriate Conversion Actions for ClickMagick Actions and/or Engagements as well.
The Default Conversion Actions allow you to specify a single Conversion Action for each of Actions, Engagements and Sales within a single Campaigns Project.
If you need to do something more advanced you’ll want to set up Advanced Rules, which you can learn about below:
How do I set up Advanced Rules for Audience Optimization?
Step 4 – Capture and Send Visitor Info with your Google Conversions
iOS users who opt out of tracking can no longer be individually tracked by Google Ads – and this means their ad optimization algorithms don’t work as well as they used to.
To solve this problem, ClickMagick can capture first-party data collected on your site and pass it to Google Ads with your conversions to generate the absolute highest event match scores possible.
If you haven’t already, follow the steps in this article to allow ClickMagick to capture your visitors’ info:
How do I capture visitor info from forms on my site in ClickMagick?
Once you’ve done that, just enable Enhanced Conversions in Google Ads by following these steps:
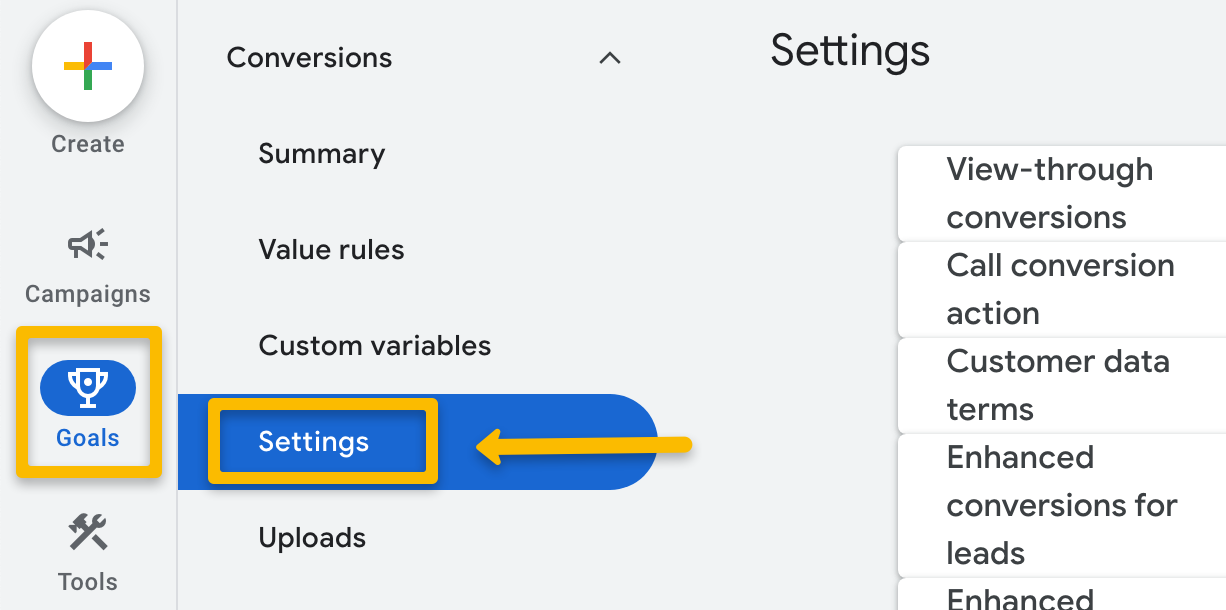
In your Google Ads dashboard, click on “Goals” and then “Settings”:
Expand the section that says “Enhanced Conversions for Leads”
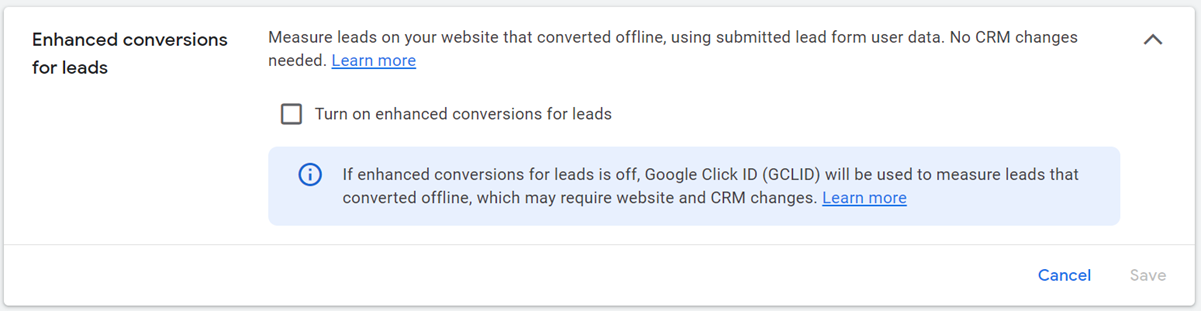
Check the box “Turn on enhanced conversions for leads”.
Note: If you haven’t previously accepted the customer data terms, you will be automatically prompted to do so. You have to accept the terms to enable this feature.
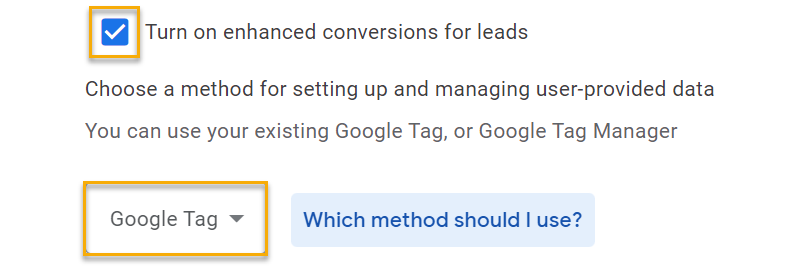
Once the box is checked, you will see a dropdown to choose the method for setting up and managing user-provided data. If you aren’t sure which option to choose, click the link to the right of the dropdown, and Google will walk you through how to determine the best one.
Click save to confirm your changes. If done correctly, you should see the settings look like this:

Once you've set this all up, ClickMagick will automatically capture visitor info from your website or online store, and send it along with your conversion data back to your Google Ads account.
At this point you will literally get the best ad optimization that Google Ads is capable of, and you can stop worrying about it. There isn’t another app or tool that can get you better Google Ads optimization, at any price.
Step 5 – Implement Google’s Consent Mode v2 framework (if you run ads in the EEA or UK)
Consent Mode v2 is Google’s updated framework designed to integrate website visitor consent preferences with Google’s advertising and analytics tools. This is now mandatory as of March 2024 if you run Google ads in the EEA or UK.
Learn more in the article below …
What should I know about Google's Consent Mode v2?
Article 926 Last updated: 05/25/2024 12:45:21 PM
https://www.clickmagick.com/kb/?article=926