|
How do I track Ringba calls in ClickMagick?
In this article you’ll learn how to track Ringba calls as conversions in ClickMagick. Just follow the steps below to start tracking your Ringba calls ...
Step 1 – Create a number pool in Ringba. If you already have a number pool you want to use, you can skip this step.
First, go to Numbers > Manage Pools > Create Number Pool.
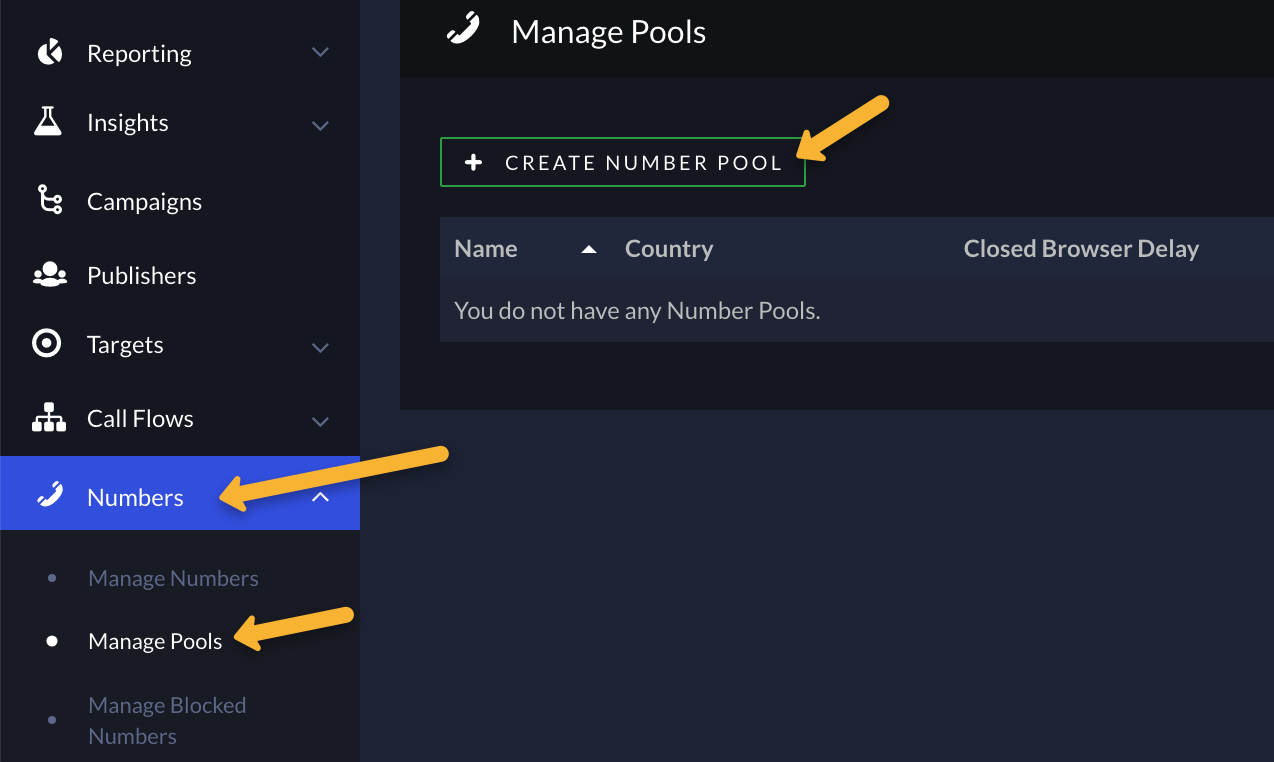
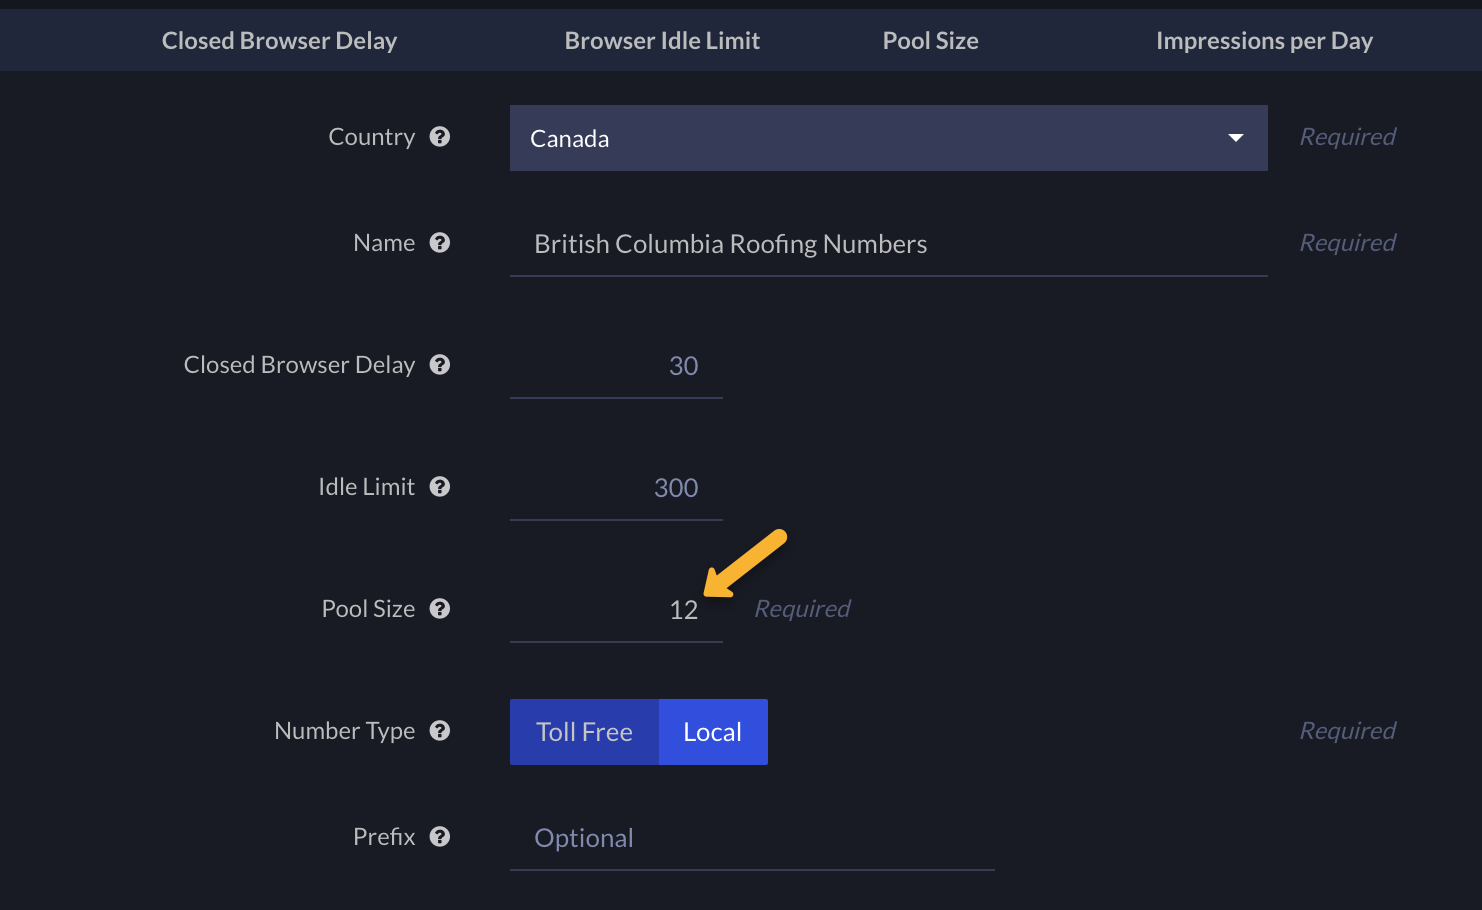
Then, add in the details for your number pool. If you’re getting a lot of traffic to your page at the same time, you’ll want to have a higher Pool Size. This is so that each visitor can see a different number and Ringba will be able to track which visitor called which number.
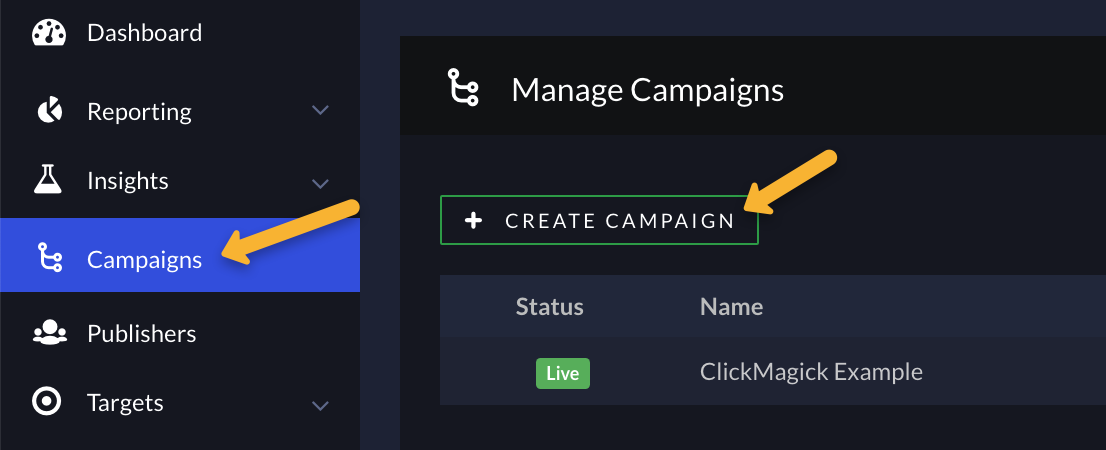
Step 2 – Create a new campaign in Ringba. If you already have a campaign you want to track, you can skip this step.
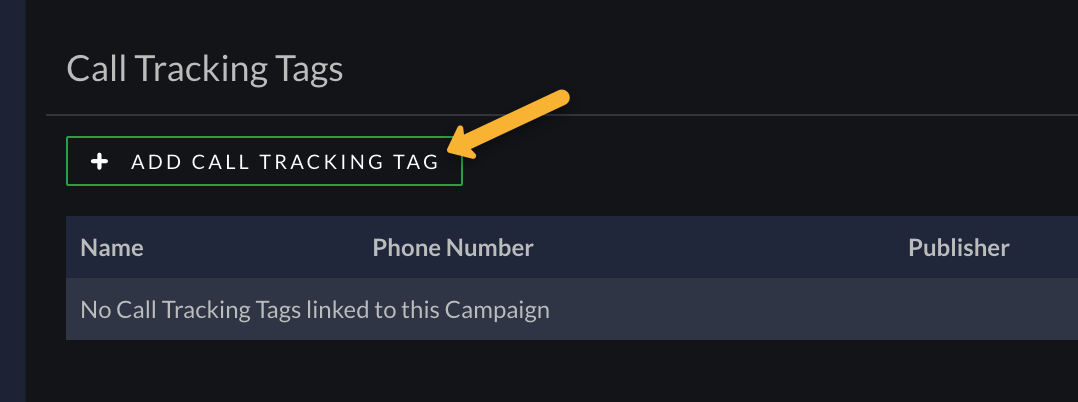
Step 3 – Create a call tracking tag and associate it with your publisher number.
Fill out all the details for your new campaign, then scroll down to Call Tracking Tags and click on Add Call Tracking Tag.
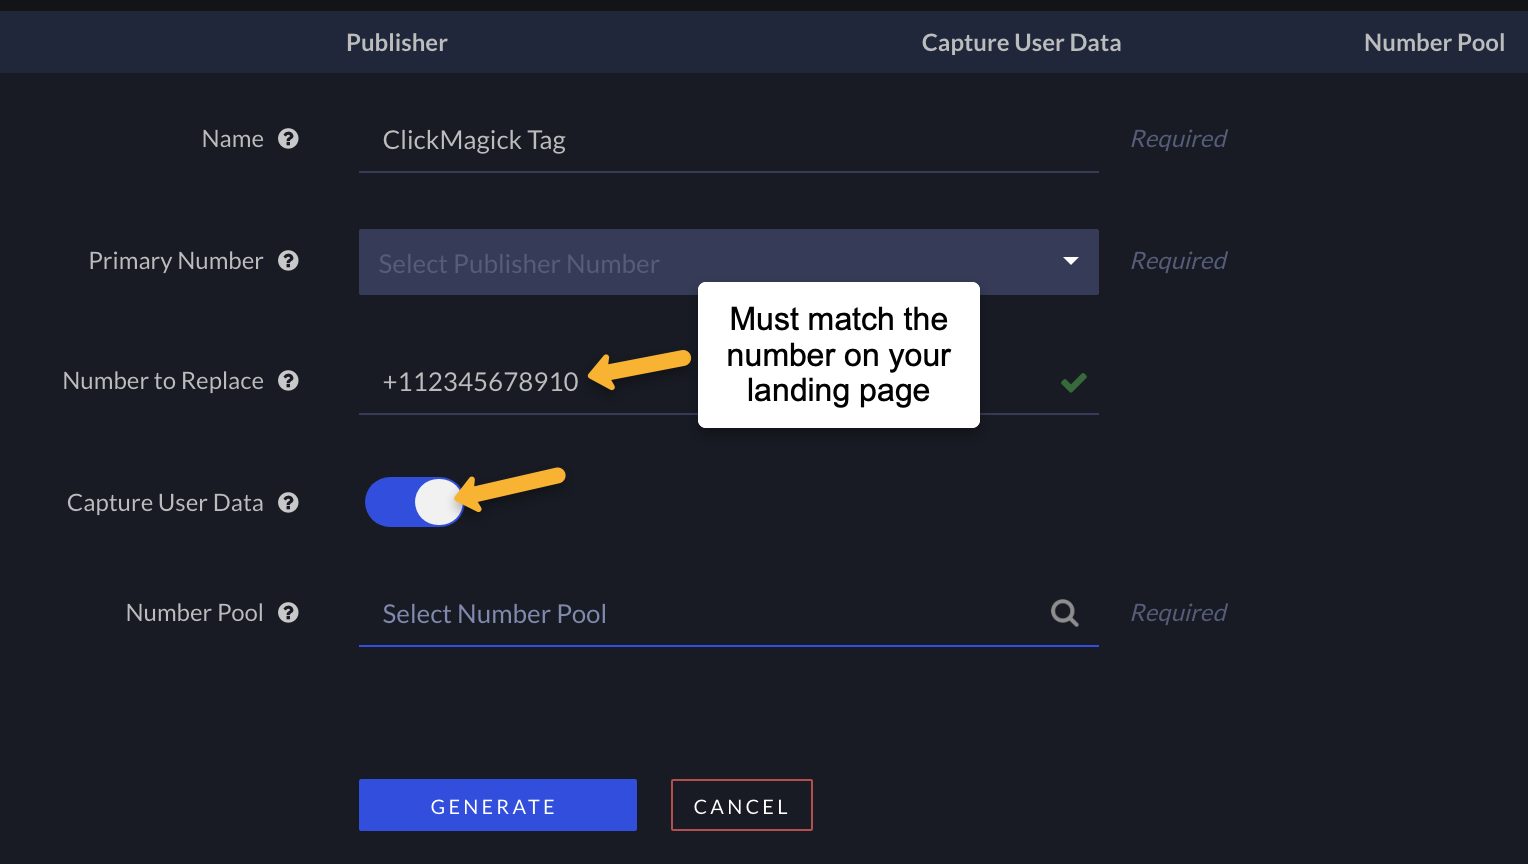
Give it a name, select the Primary Number you want this to be associated with, toggle on the Capture User Data Toggle, then select the Number Pool you created earlier.
The Number to Replace must match the phone number on your landing page, so it can be replaced with a different pool number for each visitor on your page. It’s best if this matches the Primary Number.
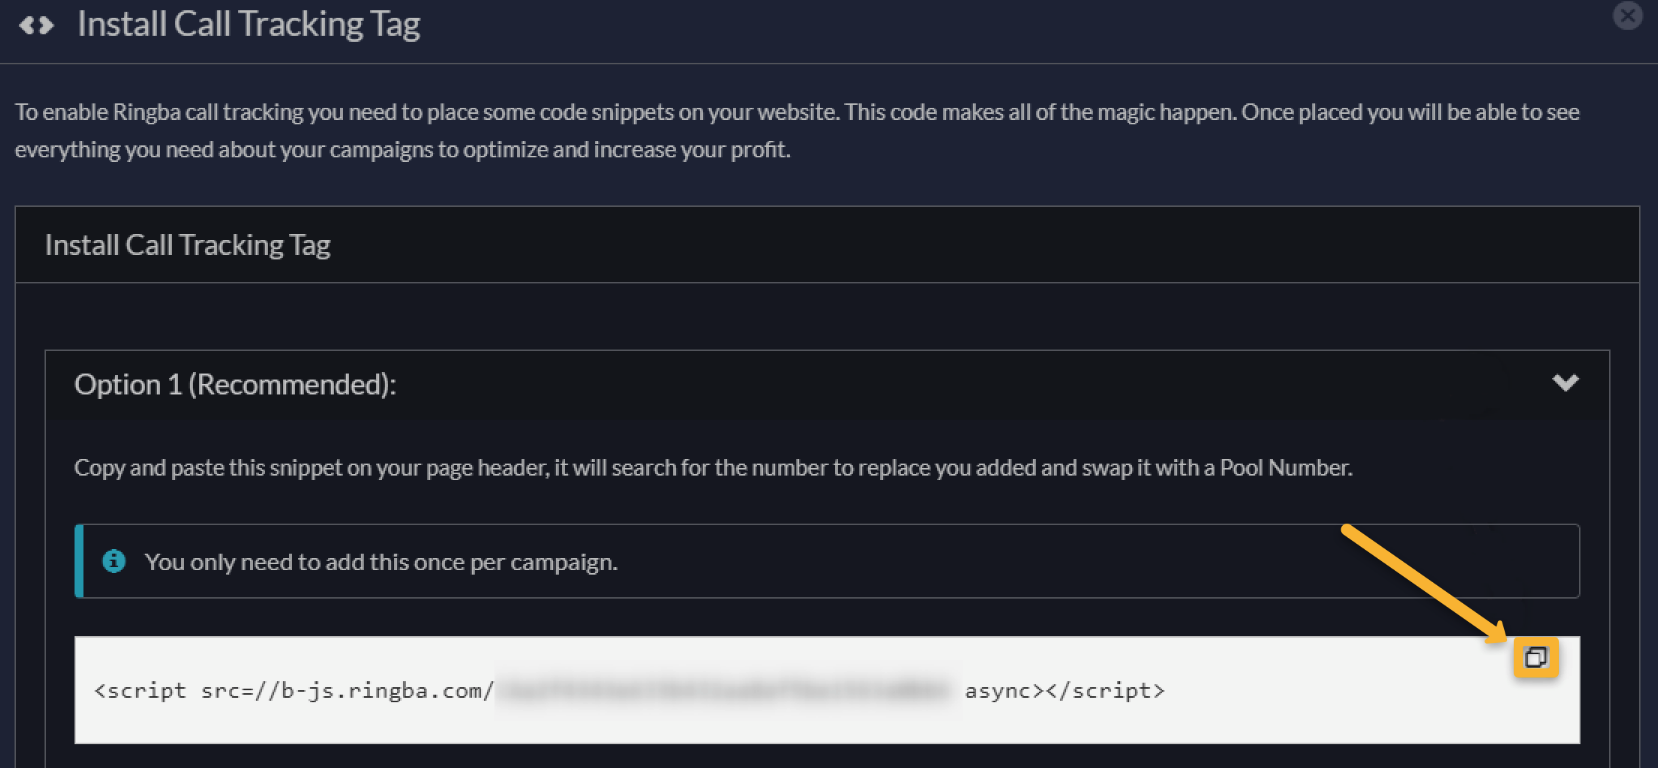
Once you’ve generated this, you’ll need to add the tag to your page. Click on the icon shown below to get the script.

Then copy the script from Option 1 and add it to your landing page, just below your ClickMagick code.

Step 4 – In Ringba, create a URL parameter to collect the ClickMagick Visitor ID and add it to your Ringba campaign.
Go to Integrations, then URL Parameters, then Create URL Parameter.
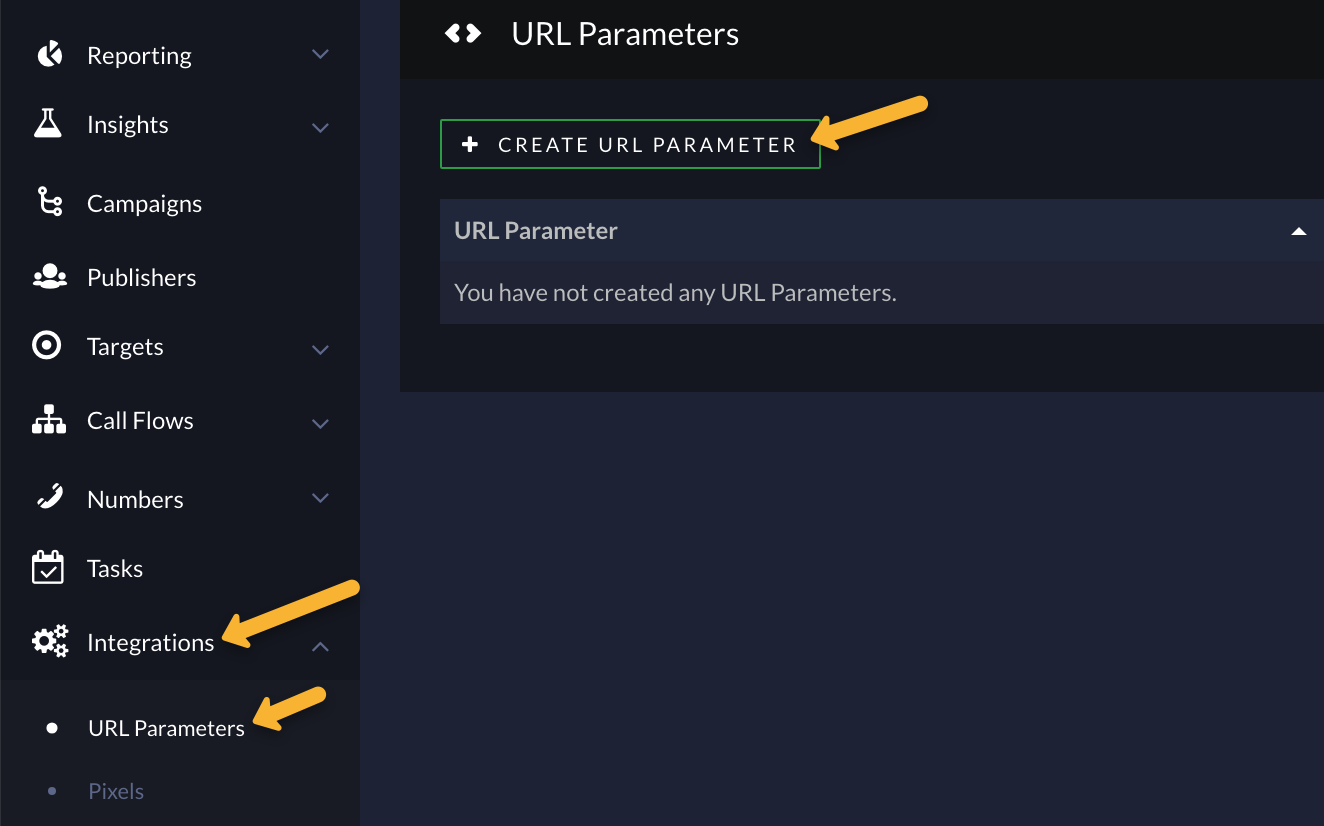
Next, enter “vid” for both the URL Parameter and Report Name sections and “User” for the Reporting Menu Name.

After this, we’ll need to associate the URL Parameter with your campaign in Ringba. To do that, go to Campaigns, select your campaign, then scroll down to URL Parameters.
Click on Add URL Parameter, select Existing, then choose the “vid” parameter you just created. Then hit Add.

Step 5 – Add the following script to the body section of your landing page. This should be below the ClickMagick and Ringba scripts you added earlier.
<script>

    setTimeout(function() {

        (window._rgba_tags = (window._rgba_tags || [])).push({ type: "User", track_attempted: "yes" });

        (window._rgba_tags = (window._rgba_tags || [])).push({ type: "User", vid: clickmagick_cmc.vid });

    }, 500);

</script>
This collects the ClickMagick Visitor ID and sends it to Ringba.
Step 6 – Add your ClickMagick Postback URL to Ringba.
To do that, go to Integrations, then Pixels, then Create Pixel.
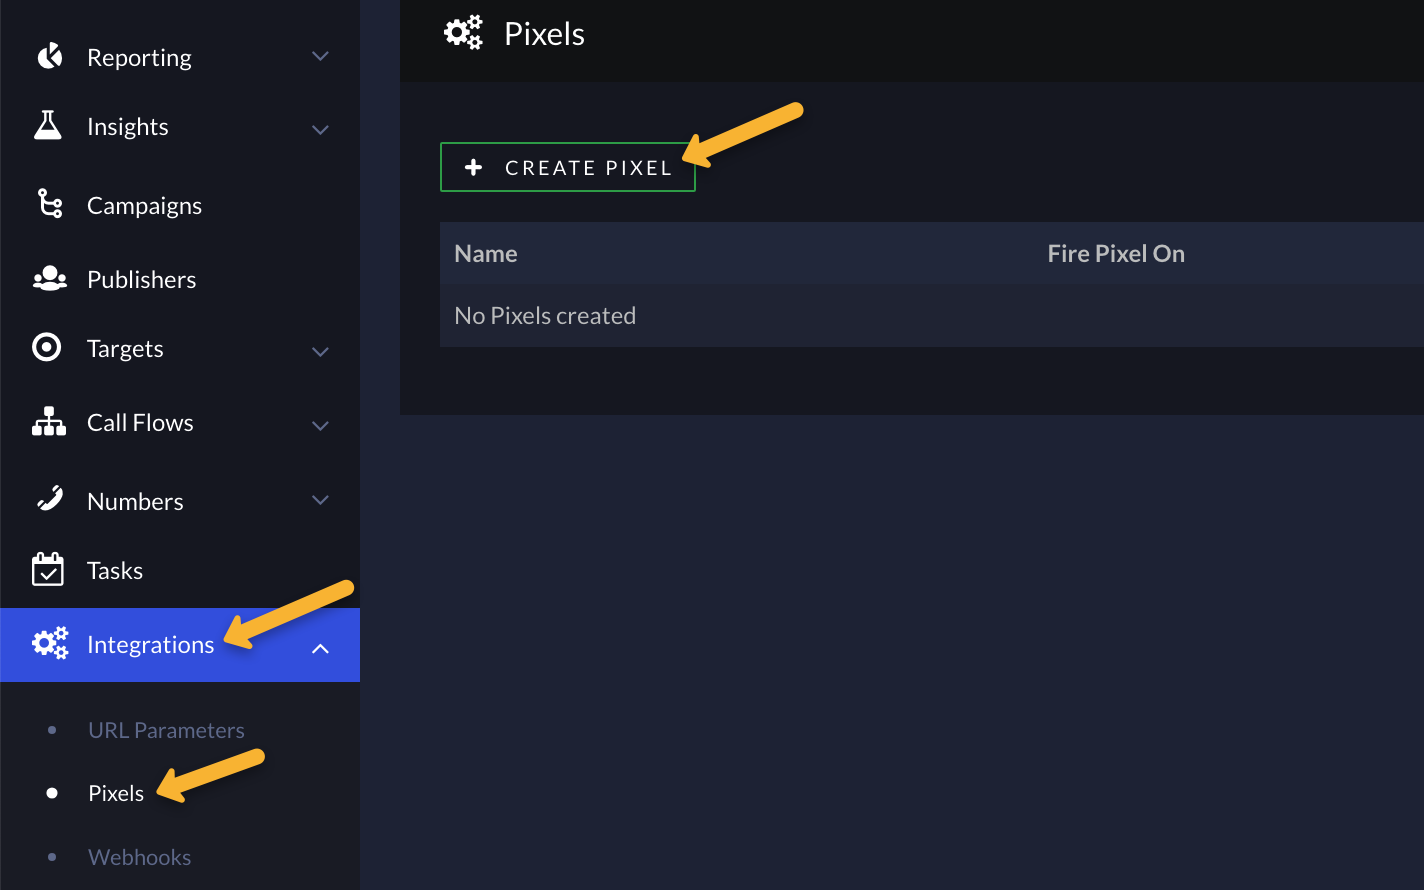
Choose which event you want the postback to fire on, then enter one of the Postback URLs below:
If you want to track this call event as an Action conversion in ClickMagick, use this as your URL:
https://www.clkmg.com/api/a/post/?uid=[USERID]&s1=[tag:User:vid]If you want to track this call event as an Engagement conversion in ClickMagick, use this as your URL:
https://www.clkmg.com/api/e/post/?uid=[USERID]&s1=[tag:User:vid]If you want to track this call event as a Sale conversion in ClickMagick, use this as your URL:
https://www.clkmg.com/api/s/post/?uid=[USERID]&s1=[tag:User:vid]&amt=[Call:ConversionPayout]
You can also use the “Tag Filters” section to only fire the postback based on the conditions you choose.
In the example below, the postback would only fire if the call length was greater than 2 minutes (120 seconds).

That’s it! You can add as many Postback URLs to the Pixels section as you need to track different call types or campaigns.
Article 909 Last updated: 01/10/2024 12:23:02 PM
https://www.clickmagick.com/kb/?article=909