|
How do I optimize my ads using the new ClickMagick pixel I’ve set up?
Once you’ve “seasoned” your new pixel you’re ready to use it to optimize your ads. And because this “clean” pixel only has your true and accurate conversion data, it’ll allow your ad network to optimize your ads like never before.
The first step is to create a custom goal to optimize your campaign with. This makes sure your campaign isn’t using mixed data from multiple conversion actions.
Follow the instructions below to get that set up:
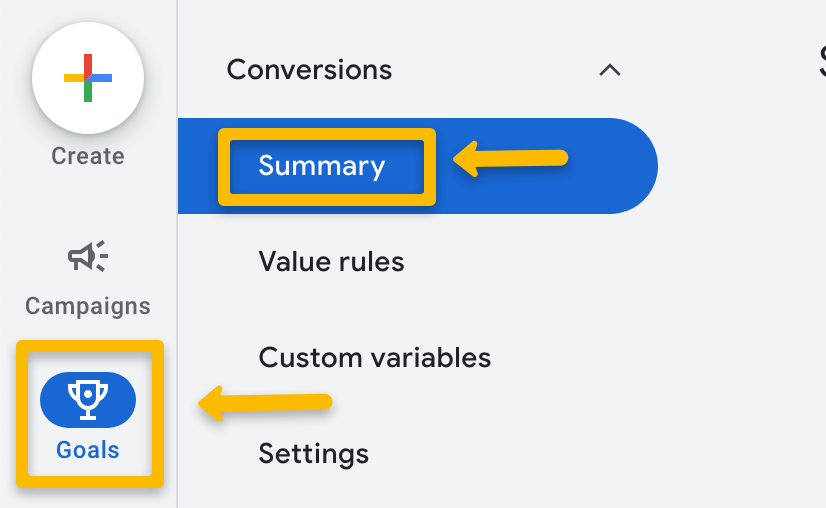
1. In Google Ads, head over to Goals, then Summary.
2. Next, click on Custom Goals, then Add custom goal.

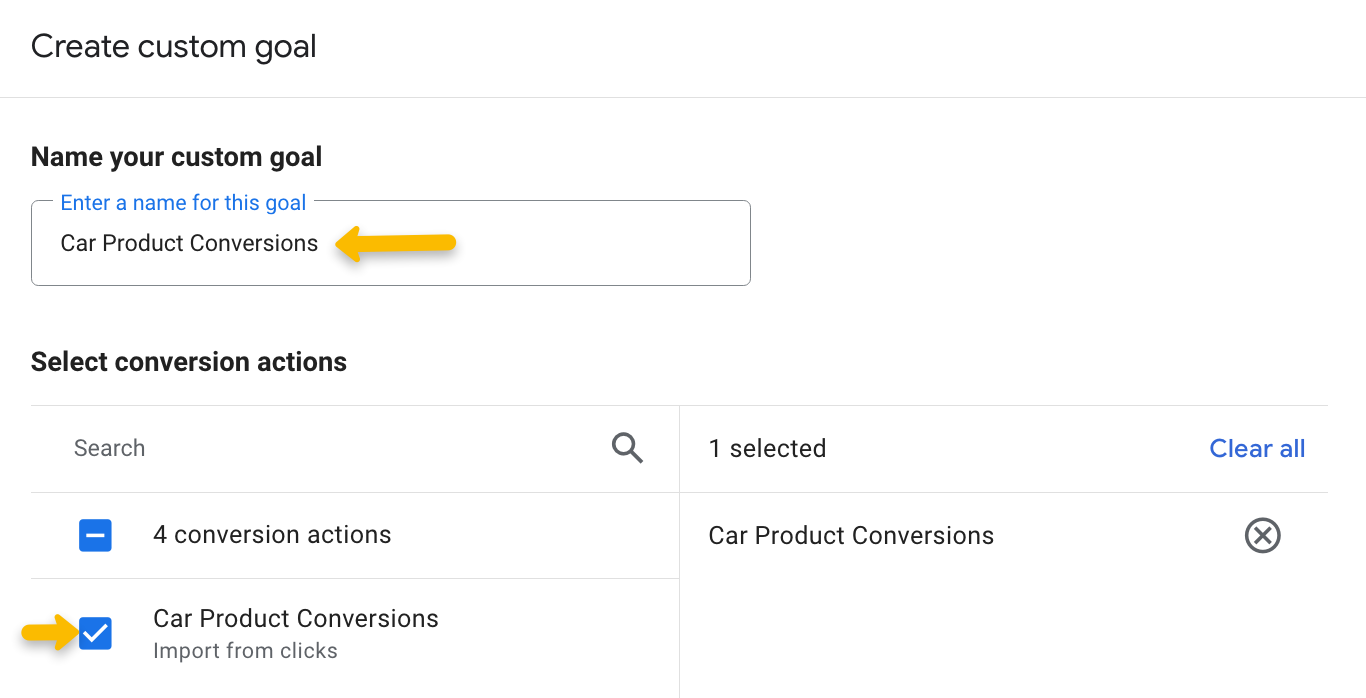
3. Give your goal a name and select the Audience Optimization conversion action(s) you want to optimize for in this campaign. Then hit Save.
4. Now that’s created, you can create your new ad campaign. For an existing campaign, skip to step 7.
On the campaign creation screen, choose Add goal.

5. Select the goal you created in step 3.
6. Finally, click on the three dot menu next to your account default goal, then Remove goal. This makes sure you are only optimizing your campaign using the new ClickMagick conversion action you created for Audience Optimization.

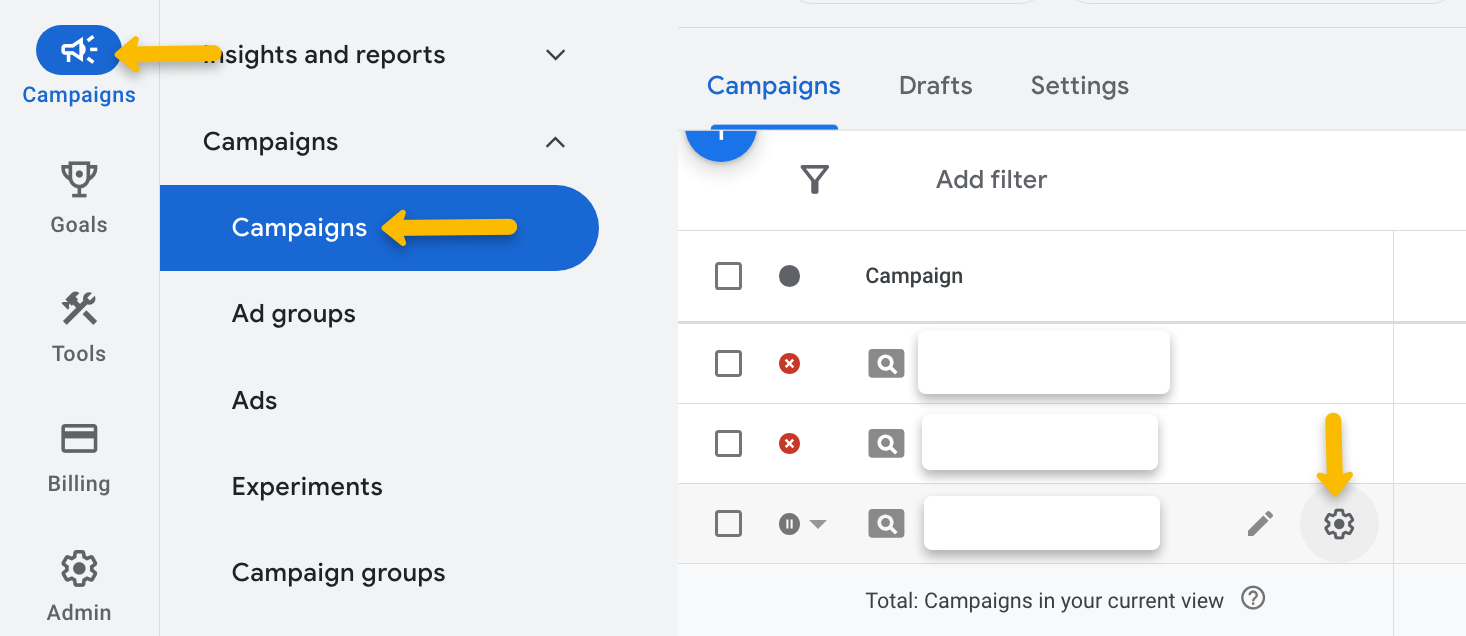
7. To edit the goal your Google ad campaign is optimizing for, head over to the Campaigns section in Google Ads. Then click on the Settings icon.
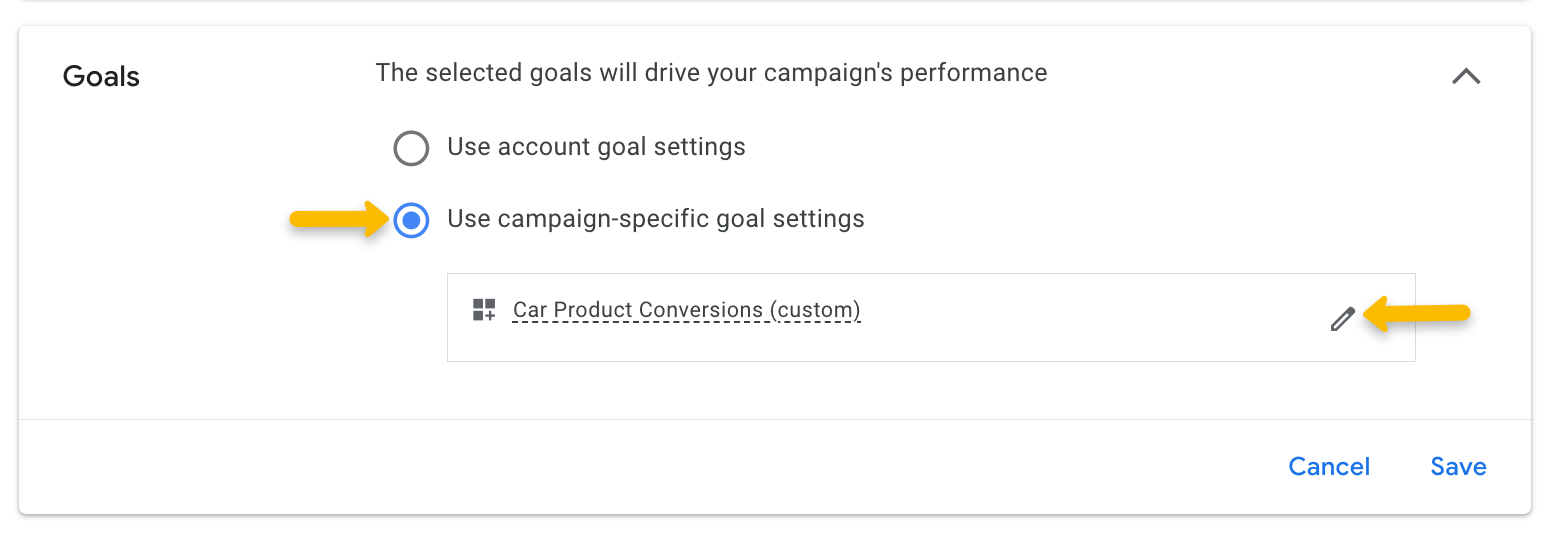
8. Choose “Use campaign specific goal settings”, then add the custom goal you created in step 3.
That’s it! Your campaign will now be optimized using the conversion action you’re using in Audience Optimization.
Facebook doesn’t allow you to edit the pixel you’re optimizing with once an ad set has been published. This means the only way to start optimizing with the new ClickMagick pixel is to duplicate your ad sets and select the new pixel there.
To select the pixel, simply edit your new ad set and choose the pixel your created for Audience Optimization under “Pixel”.
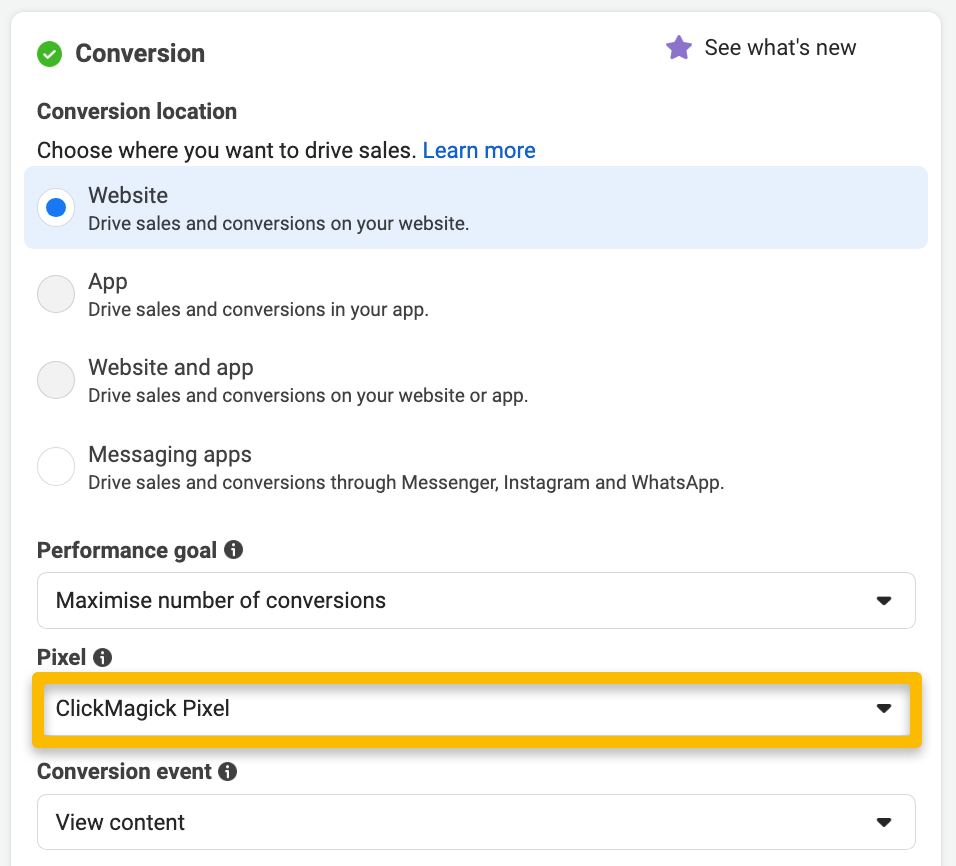
That’s it! All the ads in your new ad set will start optimizing using the pixel you created for Audience Optimization.
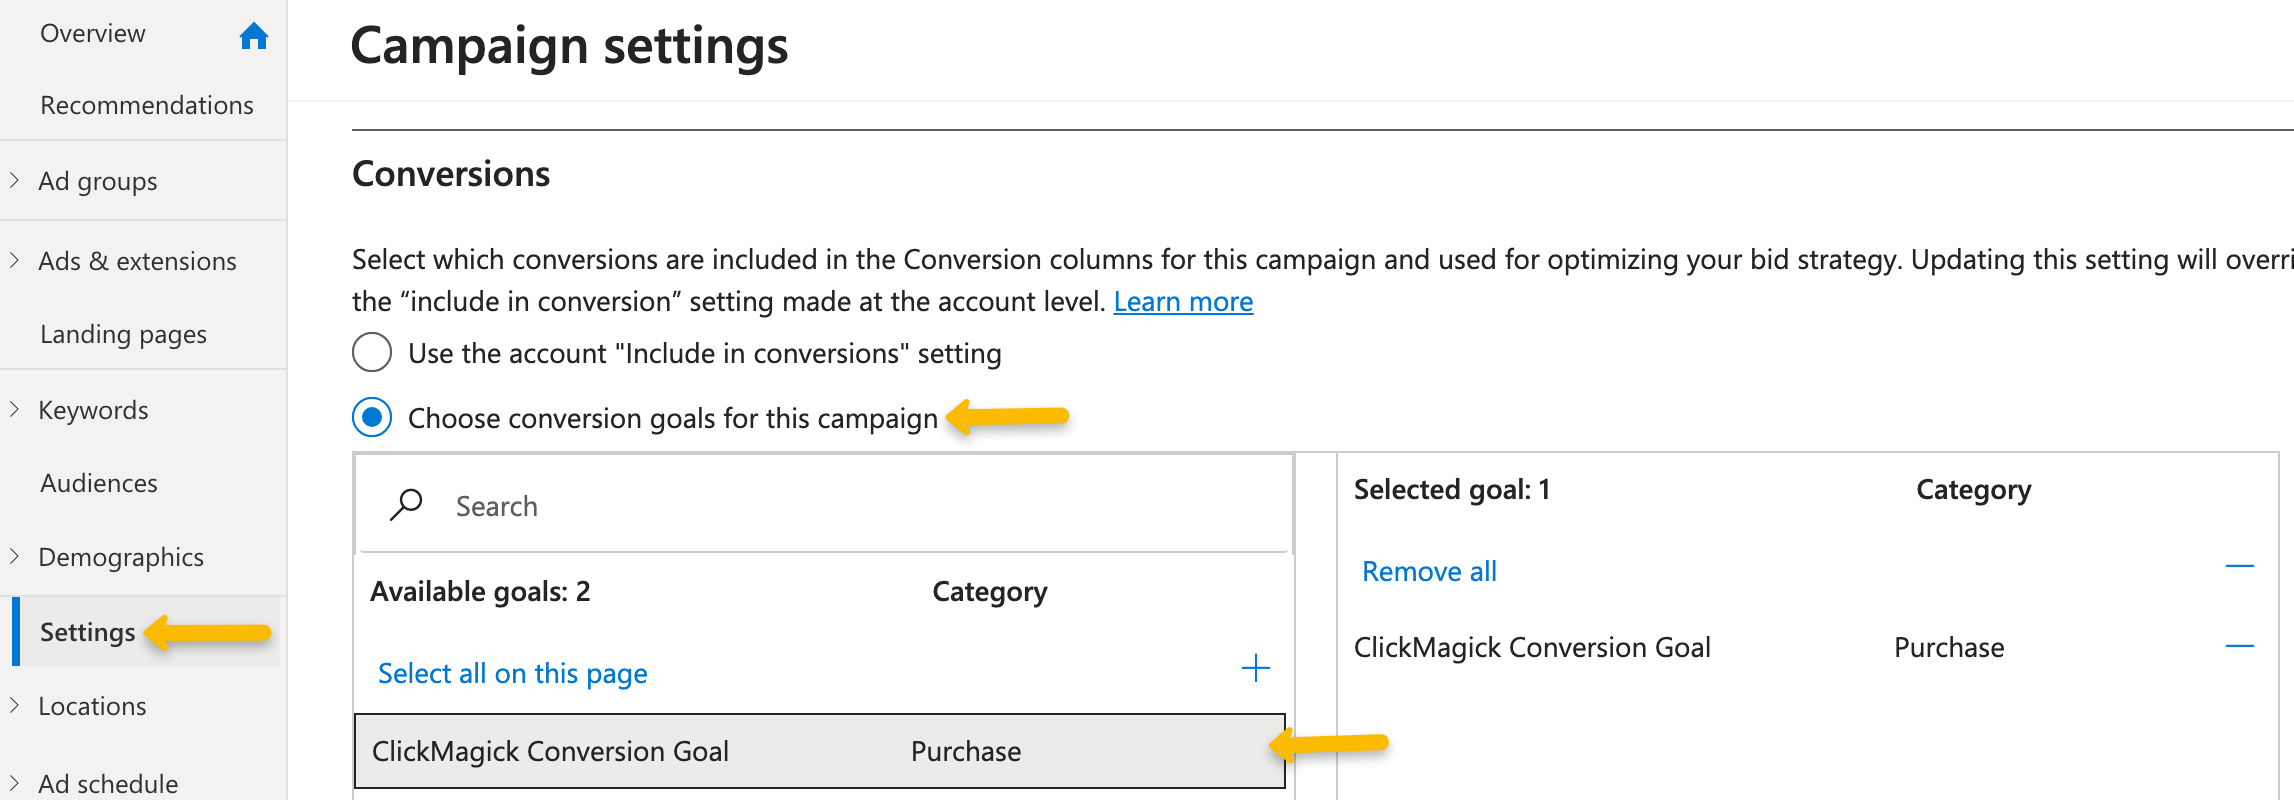
To select the new conversion goal you created for Audience Optimization in Microsoft Ads, it’s simply a case of selecting it from your campaign settings.
If you’re creating a new campaign, in the step 4 “Budget & bids” section, select “Choose conversion goals for this campaign”.
Then choose the conversion goal you created for Audience Optimization.
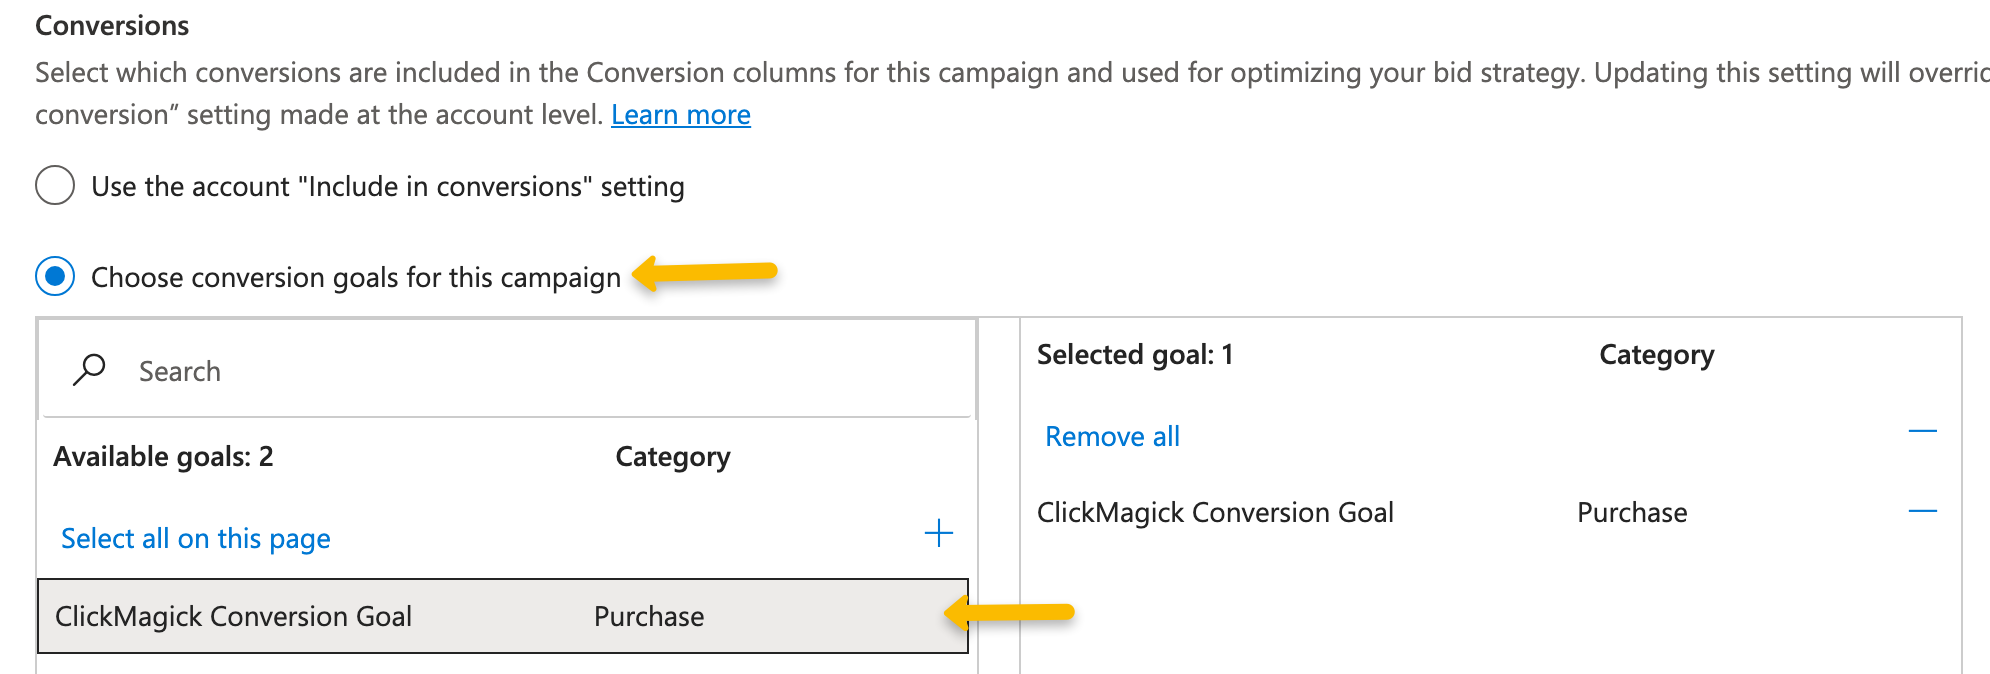
If you have an existing campaign, select the campaign, then head over to Settings and select “Choose conversion goals for this campaign”.
Then choose the conversion goal you created for Audience Optimization.
Similar to Facebook, TikTok doesn’t allow you to edit the pixel you’re optimizing with once an ad group has been published. This means the only way to start optimizing with the new ClickMagick pixel is to duplicate your ad groups and select the new pixel there.
To select the pixel, simply edit your new ad group and choose the pixel your created for Audience Optimization. You can find it under “Optimization location”, then “TikTok Pixel”.
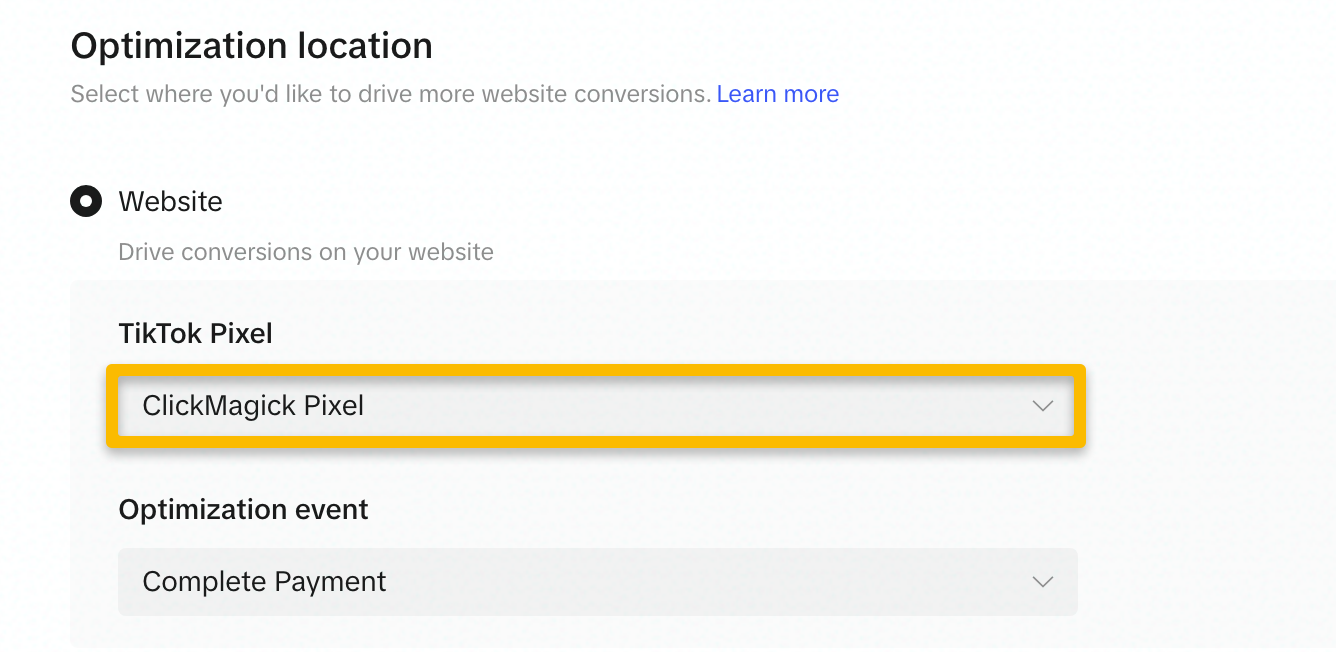
Note: If your new pixel doesn’t have any data in it yet, it may not show up until it does. So, continue using your old pixel in the meantime. During this time, ClickMagick will still send conversion data to your new pixel, warming it up.
Article 905 Last updated: 05/25/2024 1:44:01 PM
https://www.clickmagick.com/kb/?article=905