|
How do I set up affiliate tracking using an opt-in and thank you page?
This article explains how to get started as an affiliate with an opt-in page and a thank you page. It also explains how to track emails you send to your list.
Step 1 – Add your Click Tracking Code to your Opt-In Page.
Head over to Campaigns, then Tools, then Website Code.
Choose Custom Code and copy the code without making any changes, then add this code to your opt-in page.
If you are not sure how to do this, we have some of the popular builders below that you can use to learn how.
How to Add Your Click Tracking Code to Your Funnel Builder
Step 2 – Add your Action Conversion Code to your Thank You Page.
The process is the same as above, but instead of choosing Click Tracking Code, you choose Conversion Tracking Code with “Action” as the type.
You can do that by going to the Campaigns Dashboard, then Tools, then Website Code.
Select Custom Code, and switch from Click Tracking Code to Conversion Tracking Code and set the Type to “Action”.
You can also use the “Ref” value to label the conversion, which will be available to see in the Funnel Steps Report, under Reports in the Campaigns dashboard.
Here’s an example:

Copy this code and add it to your thank you page. This will track opt-ins as “Actions” in your dashboard.
Step 3 – Add a Visitor ID to Your Affiliate Link using the Affiliate Link Builder
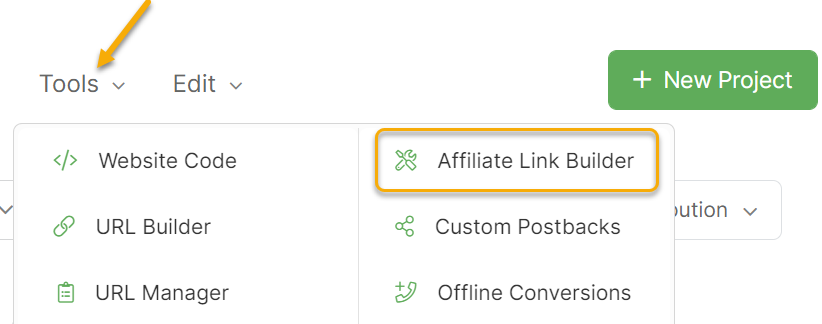
Head to the Campaigns Tools menu and choose “Affiliate Link Builder”.

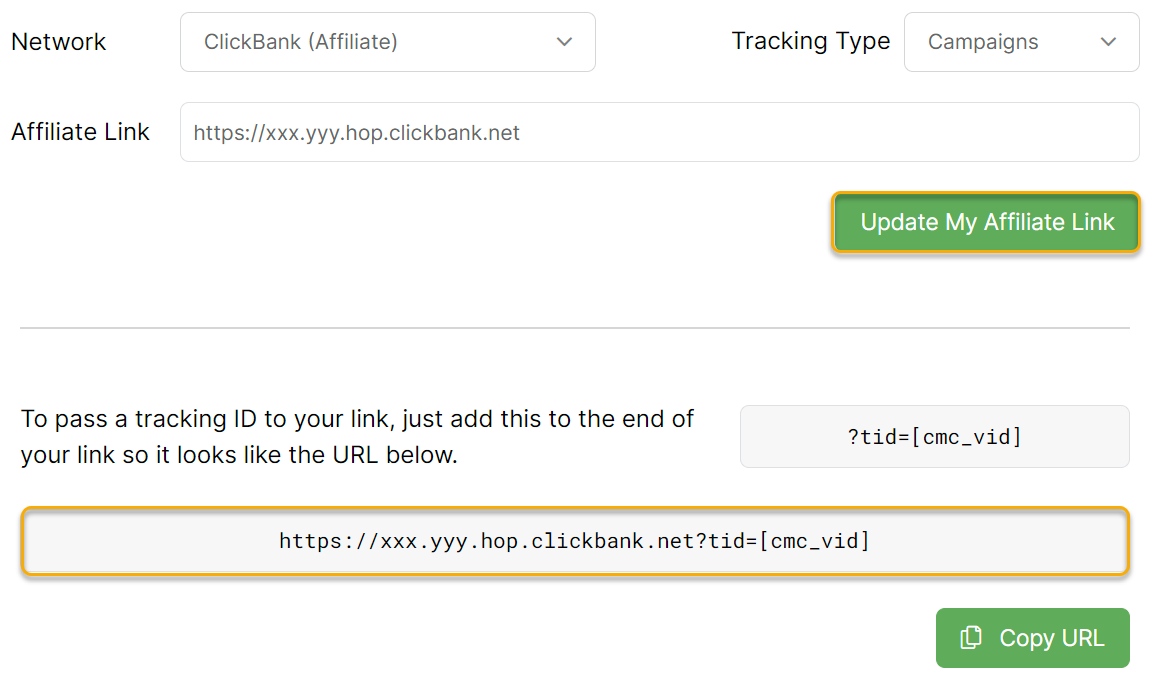
Next, select your affiliate network from the menu, paste your affiliate link into the edit box, set Tracking Type to Campaigns and click on the “Update My Affiliate Link” button.

Finally, take the modified link and use it as the affiliate link on your thank you page. This will allow you to track sales.
Step 4 – Add Your Postback URL to Your Affiliate Account
To make sure that your affiliate sales get tracked inside of ClickMagick, you’ll need to add your Postback URL to your Affiliate Account.
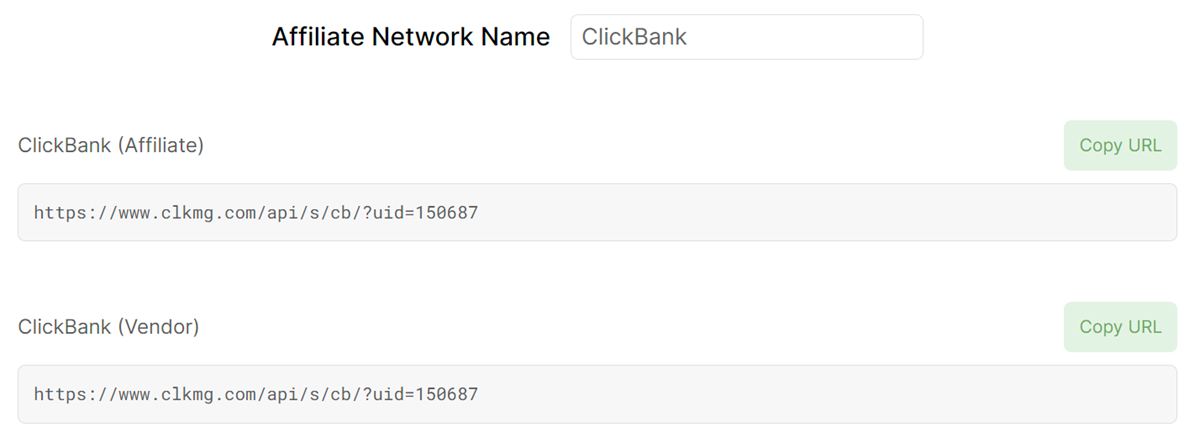
To do this, just go to the Postback URL Tool which you can find in the Tools menu under the subheading “Postback URLs”. Type in the name of your network and click on the copy button next to the network that you’re using:

The Postback URLs in your account will be different from what you see in the screenshot above, so copy the URL that you see listed in your account for the network you are using.
For more information on how to do do this, follow the article below:
How do I track affiliate sales using Postback URLs?
Step 5 – Create a UTM-Powered link for your opt-in page using the URL Builder
This is the link you’ll use to track your ads/traffic sources.
For detailed articles on how how to do this for each ad network, such as Google Ads, Facebook Ads and TikTok Ads, follow the article below:
How do I track my ads on the major ad networks?

Step 6 – Create UTM-Powered links for your emails using the URL Builder
If you’re linking to your own pages from emails, follow the article below:
How do I track the performance of emails I send to my list?
If you’re linking directly to affiliate offers from your emails, follow the article below:
How do I track link or button clicks?
Step 7 – Set up Auto Cost tracking for Google Ads, Facebook Ads, TikTok Ads or Microsoft Ads (Optional)
If you’re running on any of these ad networks, follow this article to set up Auto Cost tracking:
How do I set up Campaigns Auto Cost Update?
Step 8 – Set up Audience Optimization for Google Ads, Facebook Ads, TikTok Ads or Microsoft Ads (Optional)
If you’re running on any of these ad networks, follow this article to send conversions back to those networks:
What is Audience Optimization and how do I use it?
That’s it! All you need to do now is send traffic to your UTM-powered link and everything will be tracked with extreme accuracy. You’ll see all your conversions and other key stats for every traffic source so you can optimize and scale.
Note: You do have the option to create a short link. It is optional and is not required in order to track your affiliate sales inside of Campaigns.
Article 885 Last updated: 07/29/2023 3:50:59 PM
https://www.clickmagick.com/kb/?article=885