|
How do I add a custom form from my autoresponder to Thrive Architect?
Cross-device tracking is an excellent way to keep track of potential customers that sign up to your list on one device, but then make the purchase another time on another browser or device.
If you rely on email follow-ups to drive your sales cycle, cross-device tracking is critical to getting the most accurate stats possible to scale your traffic and optimize your business.
This article will show you how to add a custom form to Thrive Architect so you can use cross-device tracking.
If you have not created your
cmc_vid field or the custom form in the autoresponder you are using, please review the article below related to cross-device tracking. and make sure your custom field and form are created before adding anything to Thrive Architect.How do I set up cross-device tracking using Campaigns?
How to Add Your Custom Form From Your Autoresponder to Thrive Architect:
Most of the autoresponders you will connect to Thrive Architect (e.g. Aweber, GetResponse, ActiveCampaign, etc.) will have the same steps.
If you are using Ontraport, there is a section toward the bottom that you can expand to see those specific steps as they are a little different than the rest.
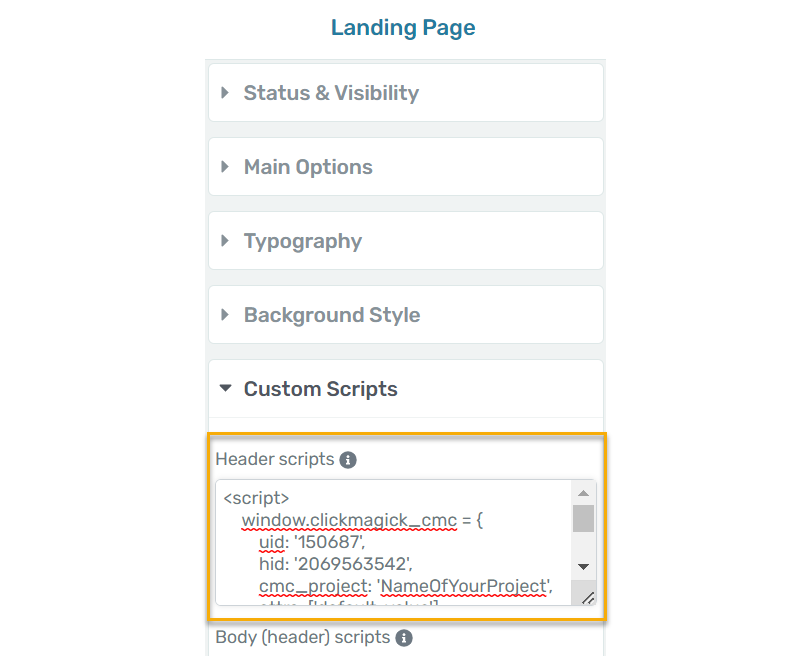
The first thing you need to do is add a special piece of tracking code to the landing page.
Here is the code that you’ll be using:
<script>

    window.clickmagick_cmc = {

        uid: '[USERID]',

        hid: '[HID]',

        cmc_project: 'NameOfYourProject',

        attrs: ['default-value'],

    }

</script>

<script src='//cdn.clkmc.com/cmc.js'></script>
Be sure to change
NameOfYourProject to be your project’s name.1. Edit the Thrive Architect landing page you use for this process.
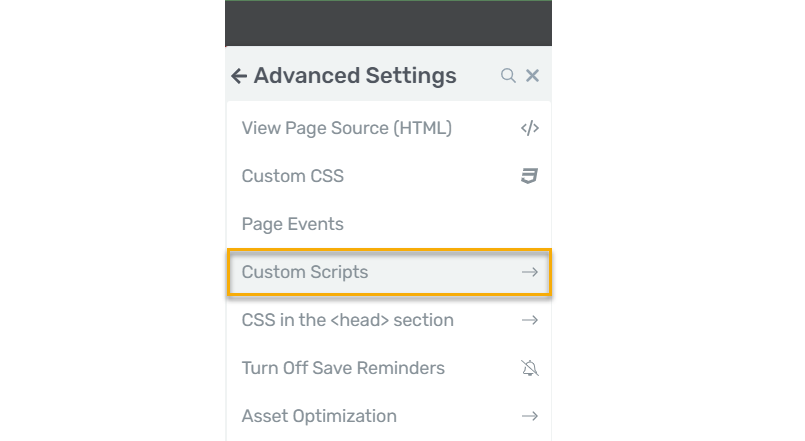
2. Click on the settings wheel on the right, then click on “Advanced Settings”.
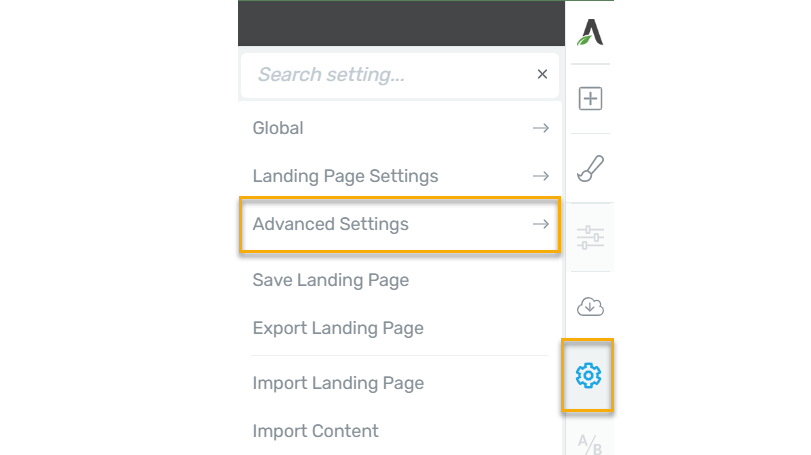
3. Now click on “Custom Scripts”.
4. Add your modified tracking code into the “Header scripts” box and save your changes.
Now we can work on adding the integration for your autoresponder.
If you do not have any autoresponders integrated with Thrive Architect, this is the best time to do that. If you aren’t sure how to do that, review the following article first:
How Do I Integrate Apps with Thrive Architect?
1. On your Thrive Architect landing page, click on the form you want to integrate with your autoresponder.
2. Click “Add Connection” on the left, and then choose the Autoresponder you’re using.
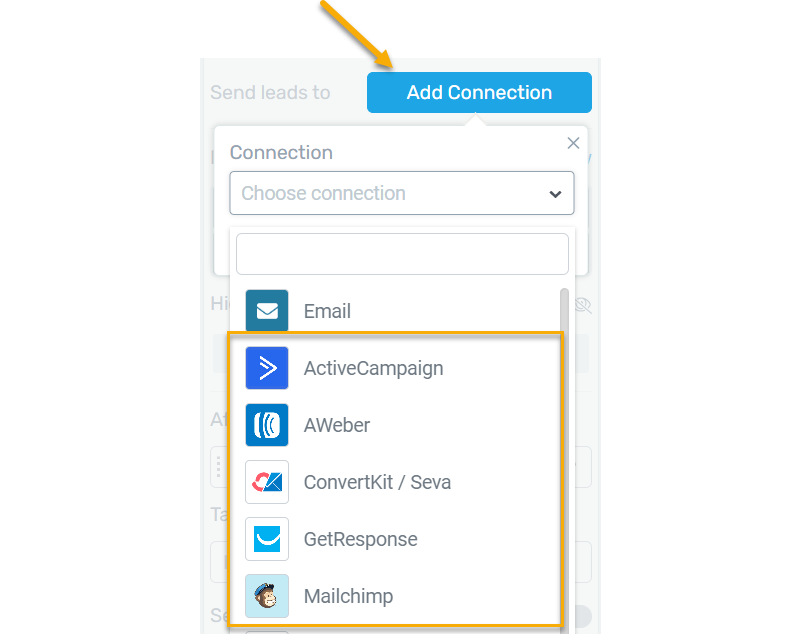
3. Choose the custom form you created within your autoresponder.
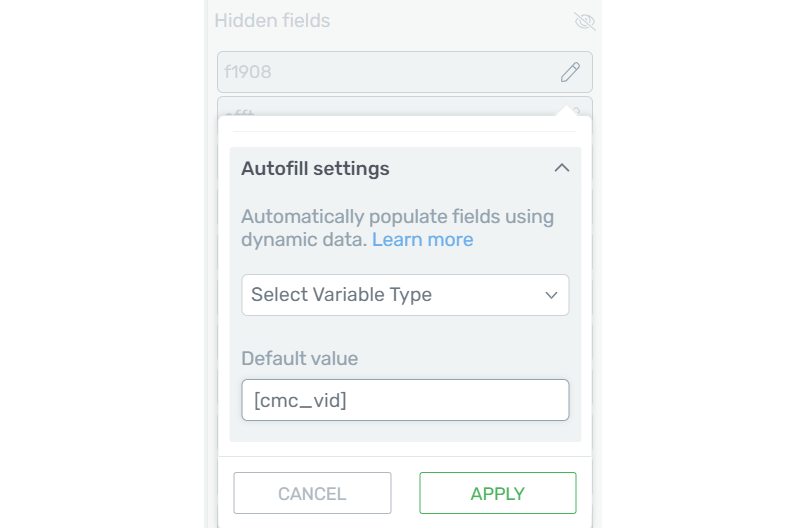
4. Click the “Add new” button to add a new field to the form. Choose “Hidden” as the type, and select the custom
cmc_vid field from the dropdown list, and then set up the Autofill settings so that the default value is “[cmc_vid]”.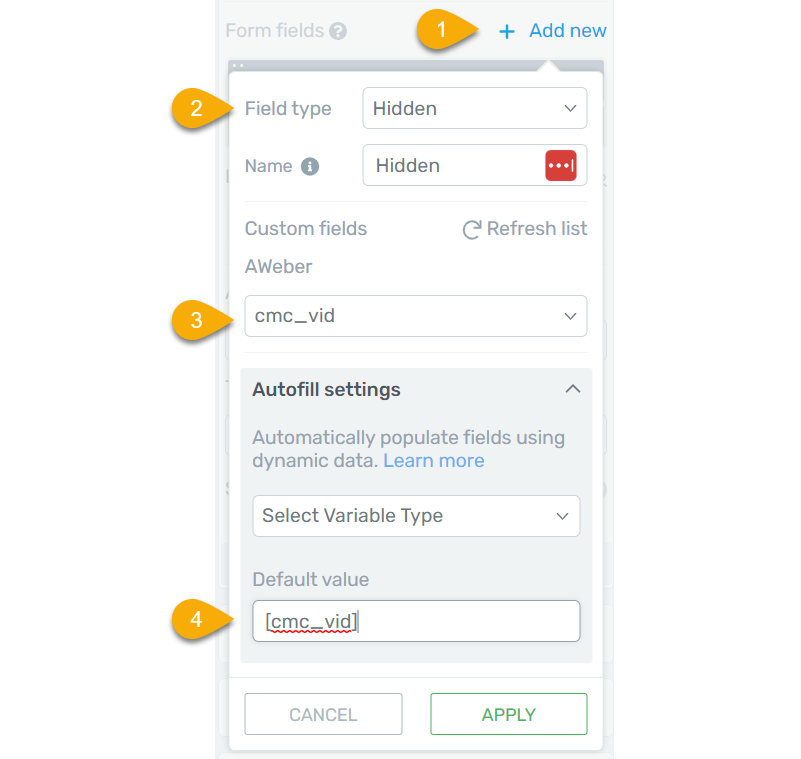
5. Click “Apply”, and then find the place just below this where you can enter what happens after successful submission.
6. Make sure it is set to “Redirect to Custom URL” and then put your thank you page URL into the box for “Target URL”.
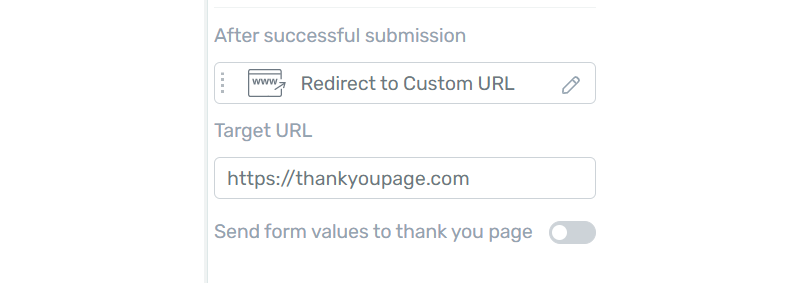
7. Now click “Save work” at the bottom.
And that’s it! You’ve now added your custom form from your autoresponder to Thrive Architect!
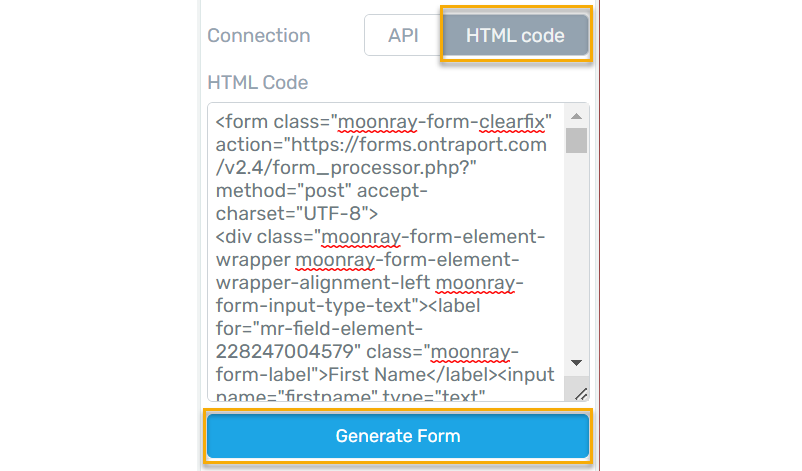
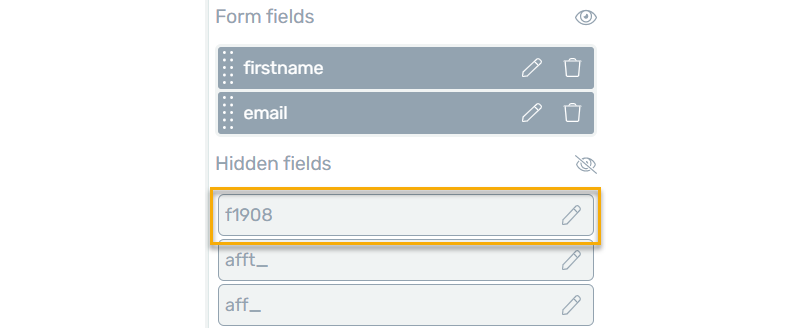
If you are using Ontraport as your autoresponder, below are the steps you can use.
How To Add An Ontraport Custom Form
Article 836 Last updated: 03/13/2023 12:22:44 PM
https://www.clickmagick.com/kb/?article=836
