|
How do I track Hotmart sales in ClickMagick?
To begin tracking Hotmart sales in ClickMagick, just follow the steps below to set up the Hotmart Integration:
Step 1 - Copy Your Hotmart Endpoint URL in ClickMagick
Head to the Integrations Page where you can find a button to set up the Hotmart Integration. After clicking on the button, you should see a page that looks like this:
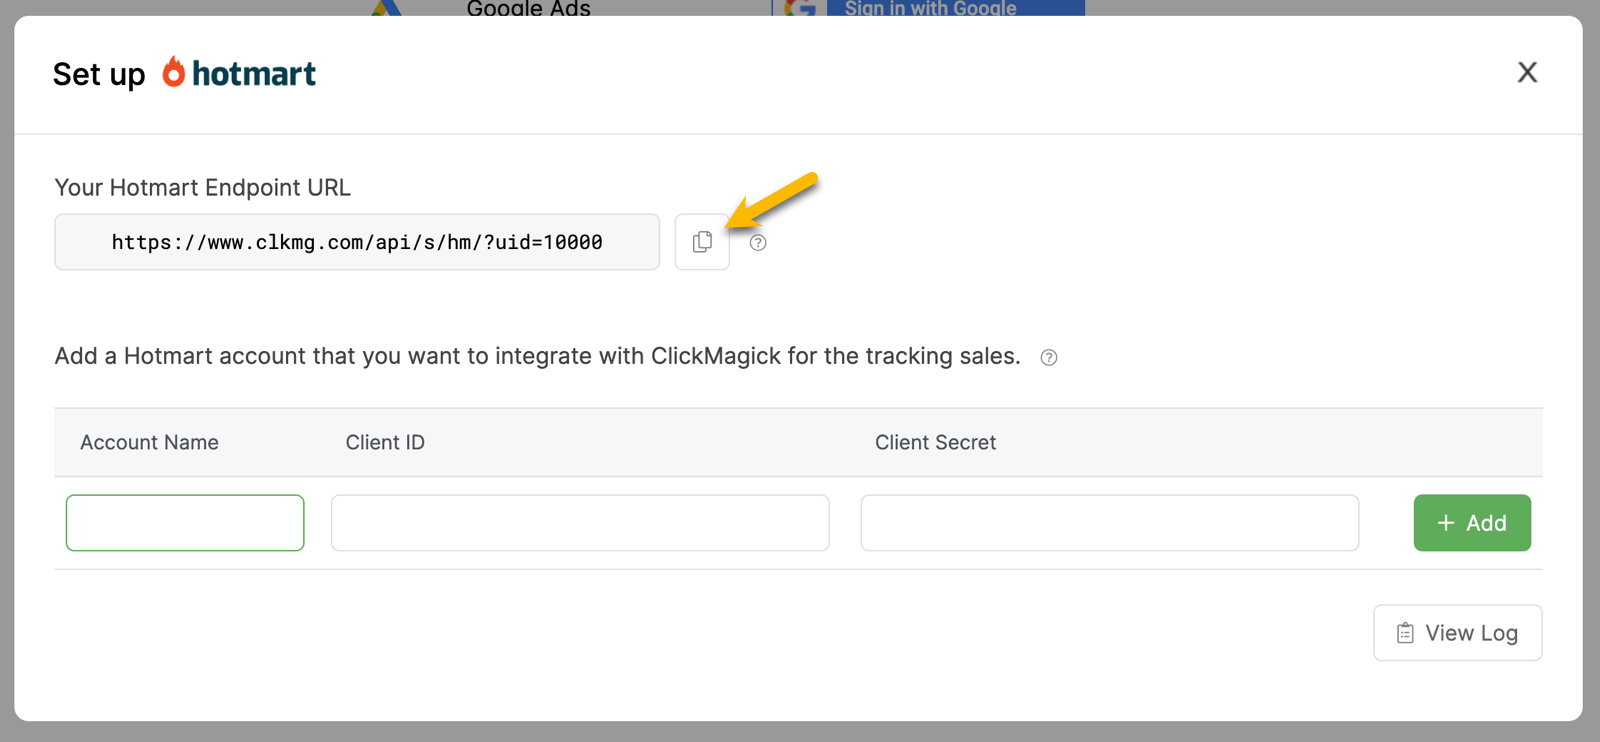
Copy the “Hotmart Endpoint URL”. You will paste this URL into a form in the next step.
Step 2 - Register your Webhook in Hotmart
In Hotmart, click on the “box” icon on the left-hand side of the page, then choose the “Tools” option.
In the “Search by tool” search box, enter “Webhook”. You should see the “Webhook (API and notifications)” tool. Click on that.
Next, click on the “Register Webhook” button in the upper-right corner of the page. Fill out the form using the settings you see below.
Enter your Hotmart Endpoint URL in the box that says “URL for sending data.” (The URL you copied in Step 1, above.)
For the “Events to share” section, choose “All”. The number of selected events may differ from the one shown in this screenshot:
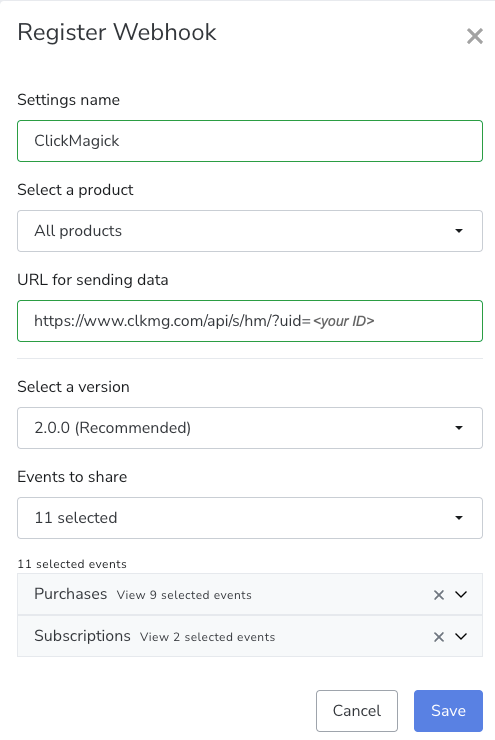
Click “Save” to finish.
Step 3 - Copy your Client ID and Client Secret to ClickMagick
Go back to the “Tools” page by again clicking on the “Box” icon on the left-hand side of the page.
Enter “Credentials” in the search box. You should find a tool called “Hotmart Credentials.” Click on that.
Next, click on the “Create credential” button in the upper-right corner of the page. Choose “API Hotmart” and click the “Create credential” button. It’s going to ask you to enter the “Credential name.” Enter “ClickMagick” and click on the the “Create credential” button. You will see a page that looks like this:
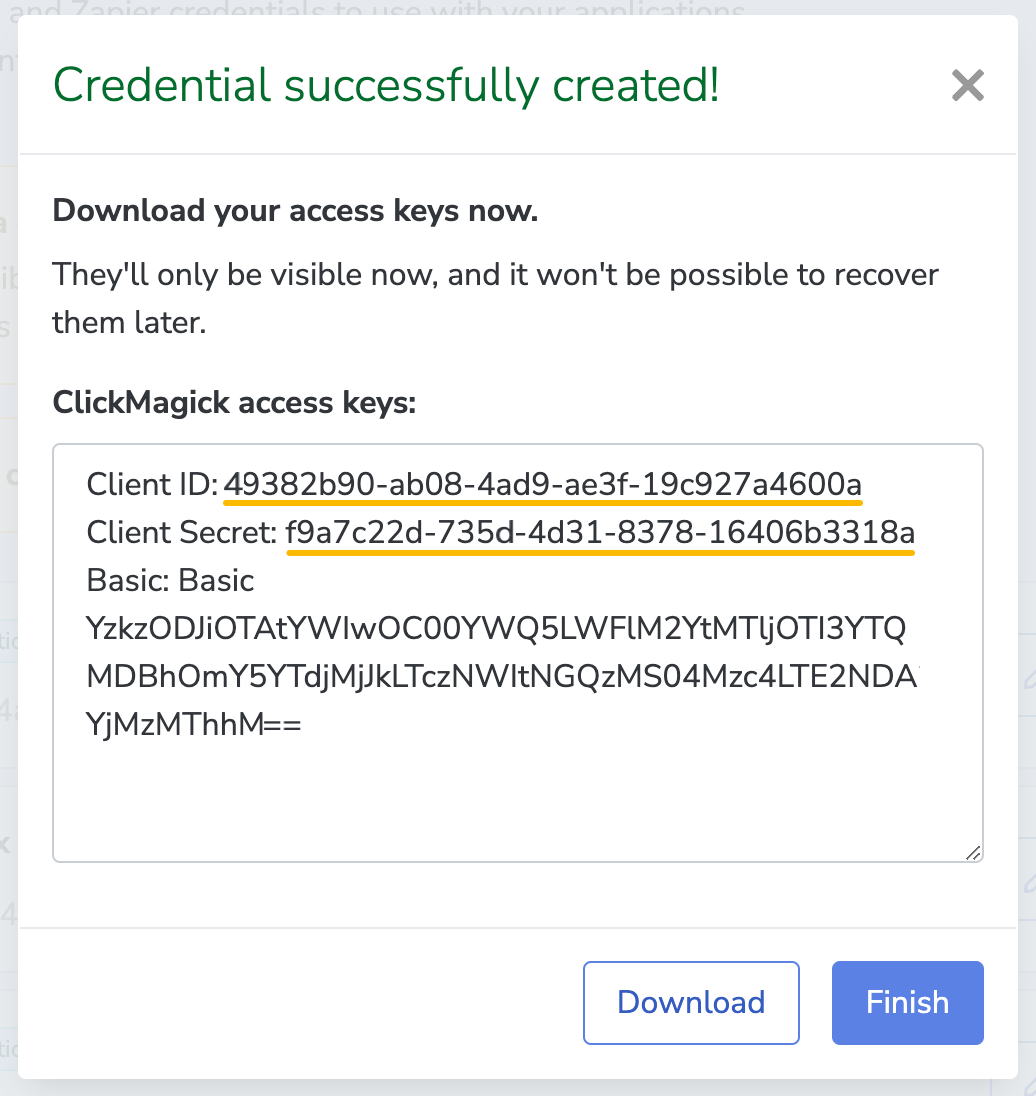
On that page, you will see a “Client ID” and a “Client Secret” which are underlined in the screenshot above.
Look back at the screenshot in Step 1 of the ClickMagick Hotmart integration. You will see two edit boxes, one for the Client ID and one for the Client Secret. On your browser page for the screenshot above, copy your values for the “Client ID” and “Client Secret” and paste them into the edit boxes on the ClickMagick Hotmart integrations page. You will need to have two browser windows open at the same time to do this.
For the account name enter anything you’d like. We’ve used “Production Account” here since that’s what Hotmart calls it.
After entering your data into ClickMagick, the Hotmart integration page should look similar to this:
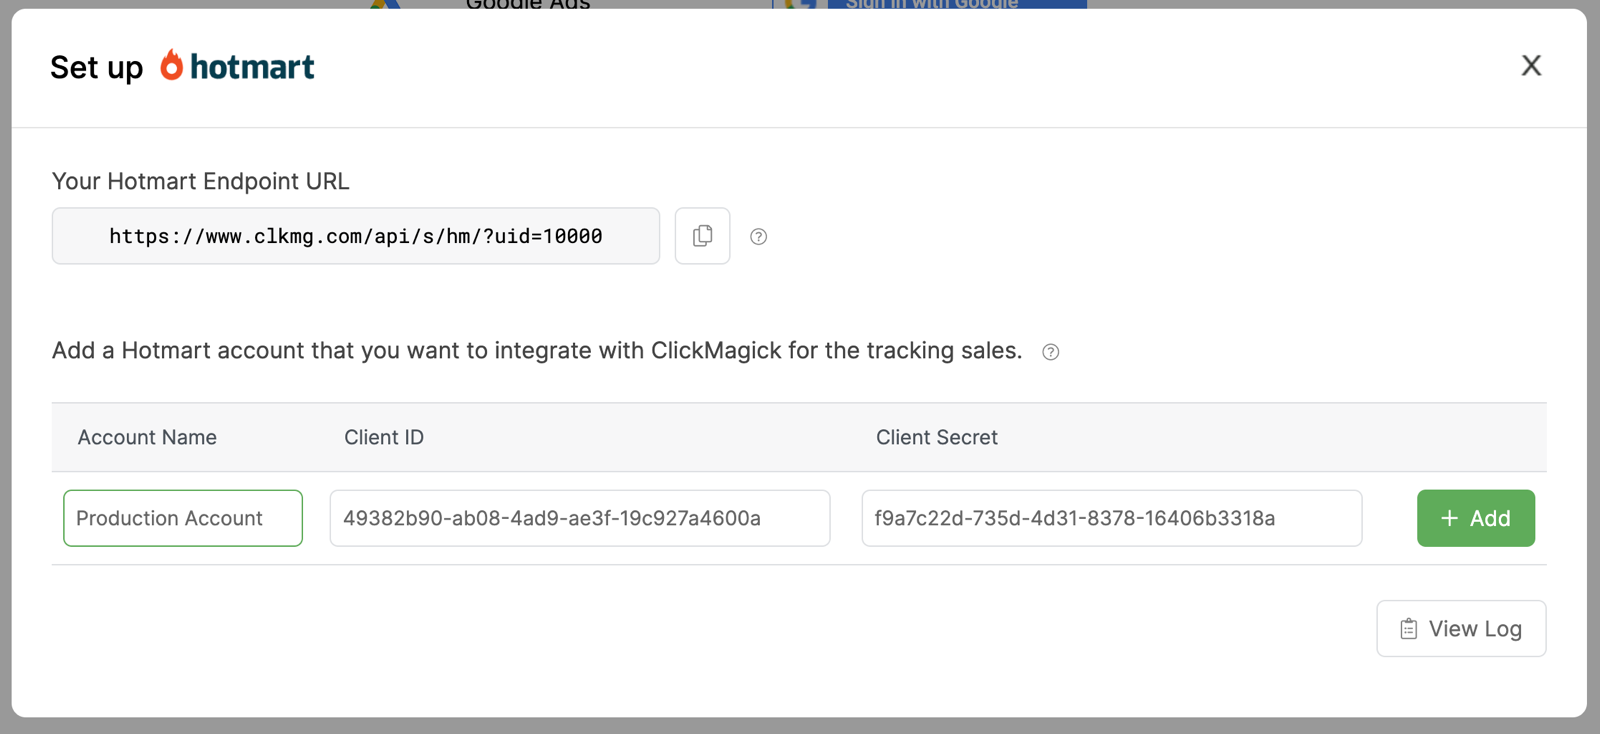
Click on the “Add” button to save your changes.
If you want to track more than one Hotmart account with ClickMagick, log into each of your Hotmart accounts and create credentials for each one, and add them to your ClickMagick Hotmart integration just like you added the first one.
Step 4 - Add a Click ID or Visitor ID to Your Affiliate Links
If you are using Tracking Links, paste your Hotmart affiliate link in the Primary URL Field then click on the menu and select Hotmart to automatically add the correct affiliate ID parameter.

If you are using Campaigns, then you'll head to the Affiliate Link Builder, select Hotmart, set type to Campaigns, enter your affiliate link and click update:
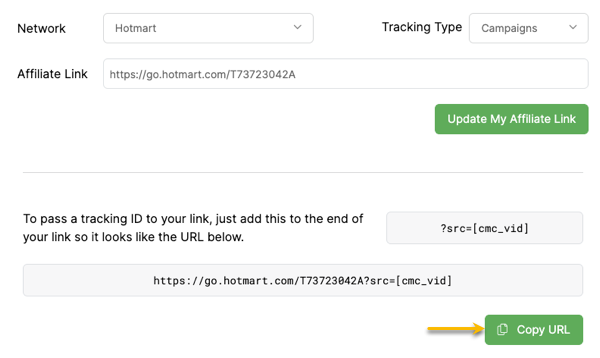
The updated affiliate link is what you'd use on your landing pages with Campaigns.
That's it! Once you start sending traffic to your Hotmart links, ClickMagick will automatically record the sales made.
Note: Hotmart is a new integration in ClickMagick and the English-language version of Hotmart’s documentation is not up-to-date with what Hotmart is actually sending to ClickMagick when a sale is made. This has made it somewhat of a challenge implementing all of Hotmart’s features. Right now, we support Affiliate, Co-Producer, and Producer sales. We also handle Recurring and Installment sales.
If you think that a sale hasn’t been recorded as you would expect it to, let us know and we’ll look at the actual data that Hotmart sent us for that sale. Just submit a ticket to the Helpdesk and we’ll come up with a solution. Thanks for your help in this.
If you think that a sale hasn’t been recorded as you would expect it to, let us know and we’ll look at the actual data that Hotmart sent us for that sale. Just submit a ticket to the Helpdesk and we’ll come up with a solution. Thanks for your help in this.
Article 749 Last updated: 05/17/2024 6:05:04 PM
https://www.clickmagick.com/kb/?article=749