|
How do I track Digistore24 affiliate sales and checkout hits?
Tracking Digistore24 sales only takes a few steps, follow the article below to get set up in just a few minutes. Optionally, if you want to track Digistore24 checkout hits, click the Checkout tab below and follow the steps there too.
Step 1 – Add your postback URL to Digistore24
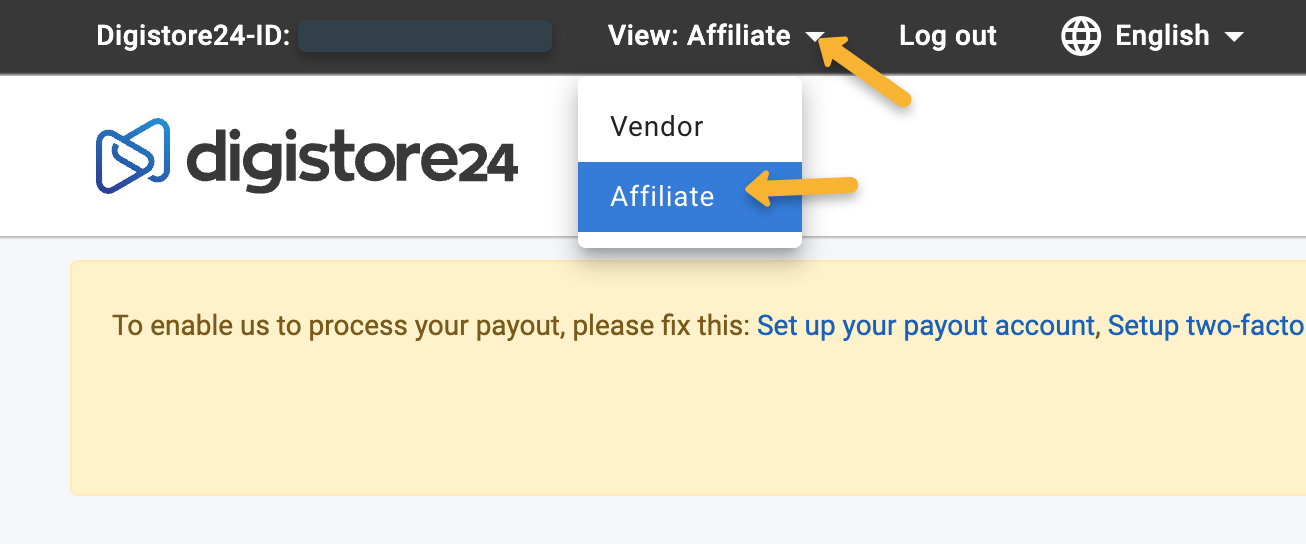
In your Digistore24 account, make sure you have the “Affiliate” view selected in the top left hand corner.
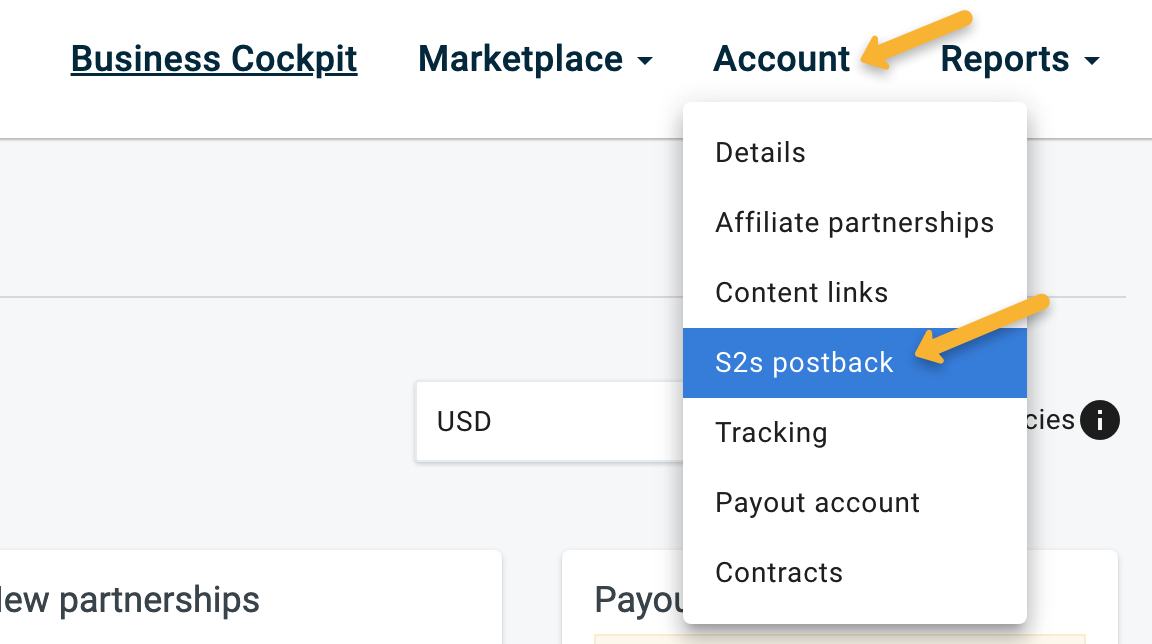
Click on “Account”, then “S2S postback” in the top right hand corner.
Click on “Add s2s postback integration”.

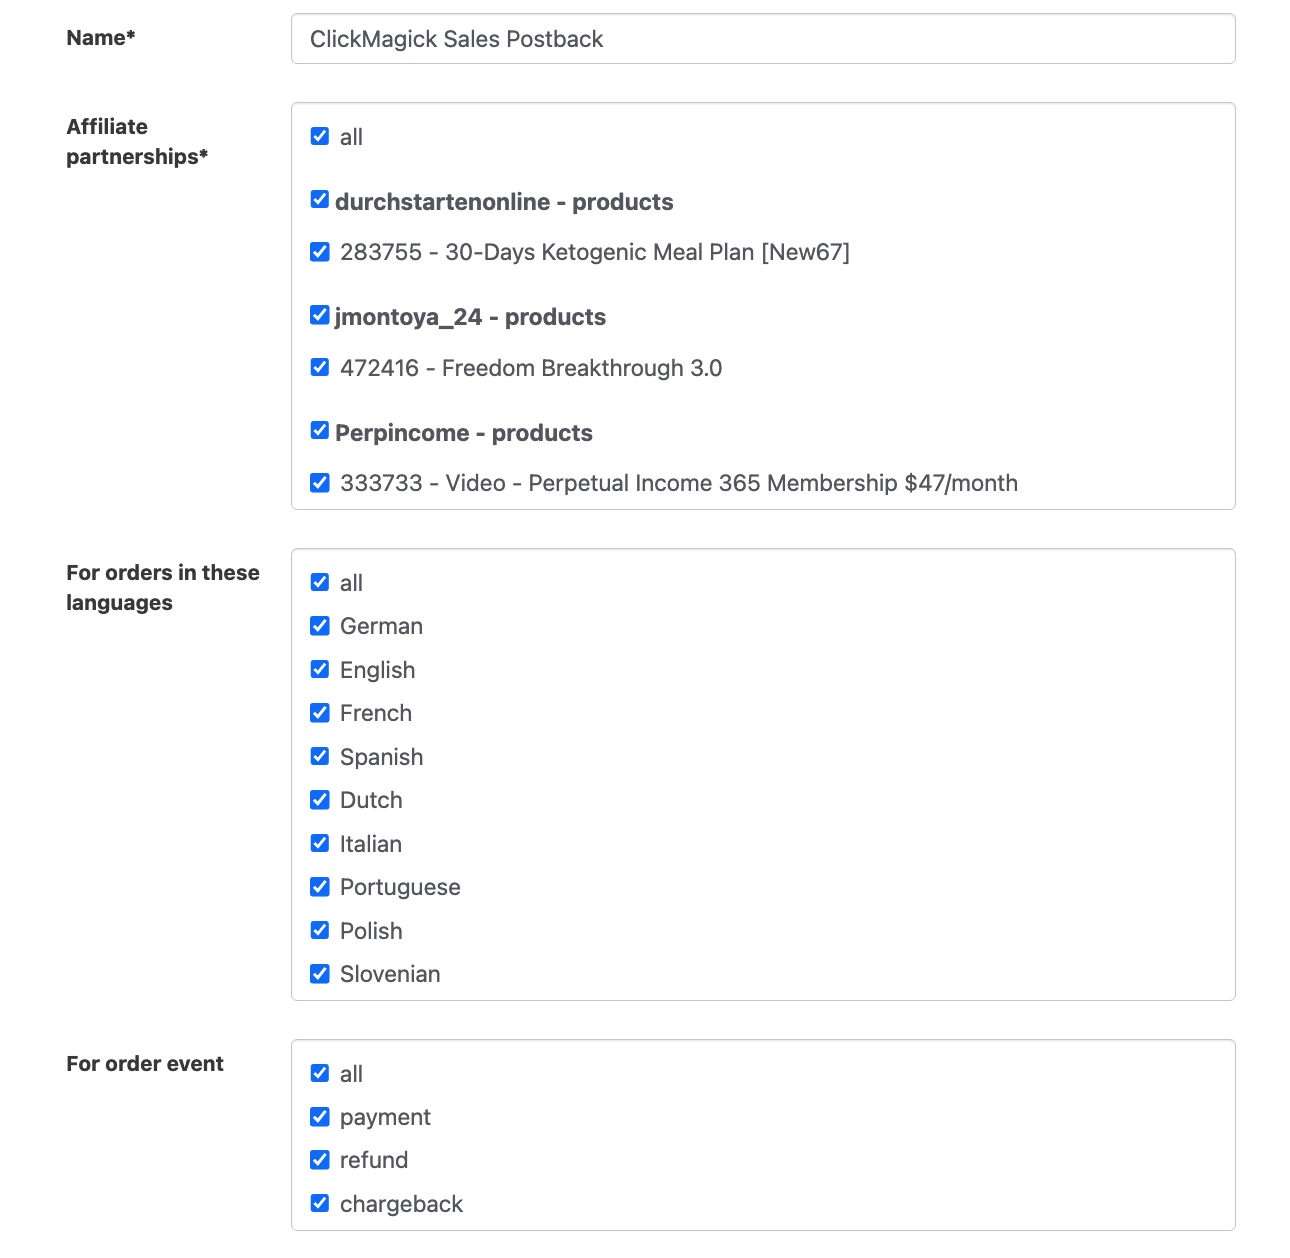
Give it a name such as “ClickMagick Sales Postback”, select all affiliate partnerships, all languages and all order events.
Next, copy the custom postback URL below and paste it into the “Postback URL” section:
https://www.clkmg.com/api/s/post/?uid=[USERID]&s1={cid}&amt={amount_affiliate}&ref={order_type}
Just hit “Save” afterwards, the “Test” function isn’t needed in this case.

Step 2 – Add a visitor ID to your affiliate link
Select the product you’d like to promote and copy your promolink from Digistore24.

In ClickMagick, go to the Campaigns section. Select Tools, Affiliate Tools, then Affiliate Link Builder.

Select Digistore24 as your affiliate network. You can scroll down the list or use the search bar (as shown below).

Make sure the “Tracking Type” is set to "Campaigns”, then paste in your affiliate link. Hit “Update My Affiliate Link” and you’ll be given an updated affiliate link below.

Copy this updated affiliate link to your landing page and you’re all set!
You can track checkout hits as “Engagements” in ClickMagick. You’ll just need to add a pixel to your Digistore24 account. Follow the steps learn how.
Step 1 - Access The Tracking Section
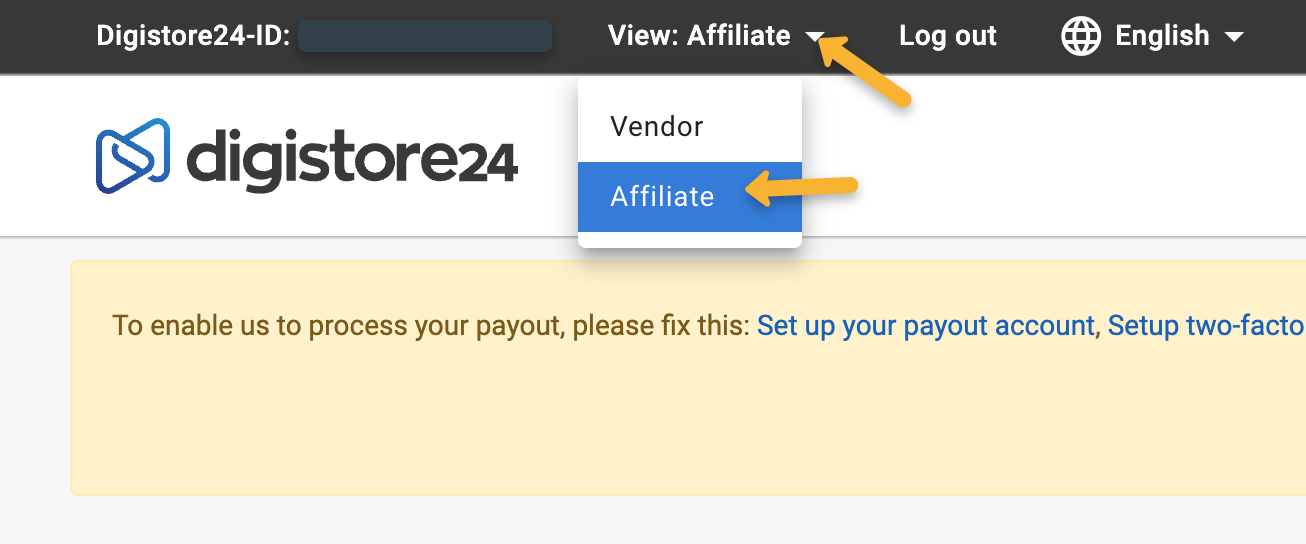
In your Digistore24 account, make sure you have the “Affiliate” view selected in the top left hand corner.
Click on "Account" then "Tracking" in the drop-down.
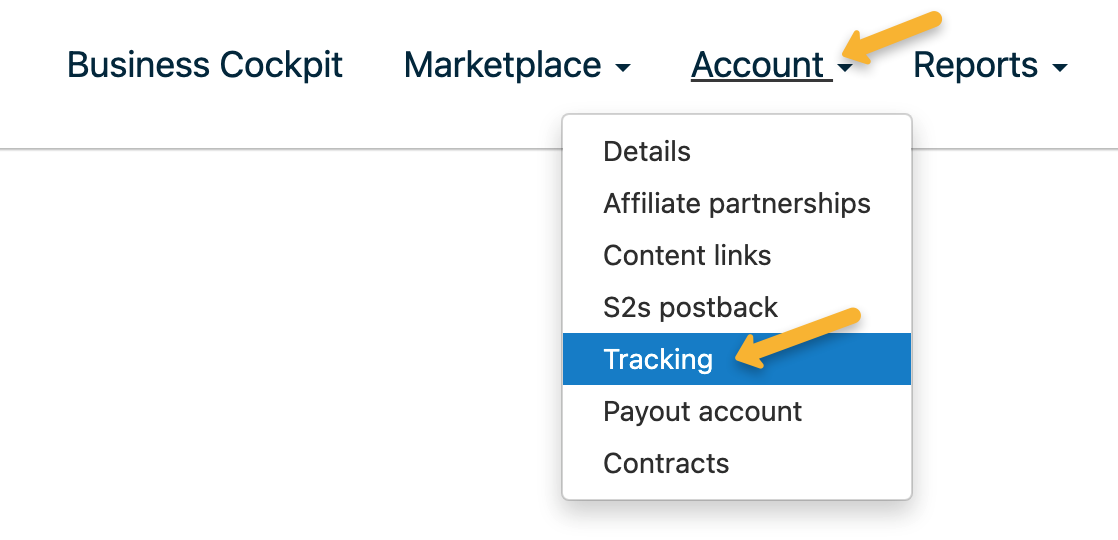
Step 2 - Add Your Engagement Pixel
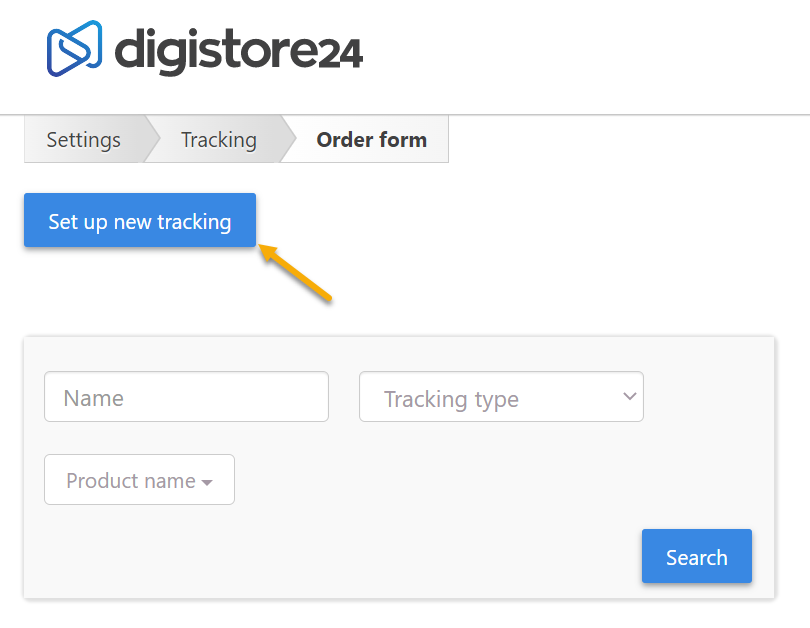
Click on the “Set up new tracking” button in the top left corner:
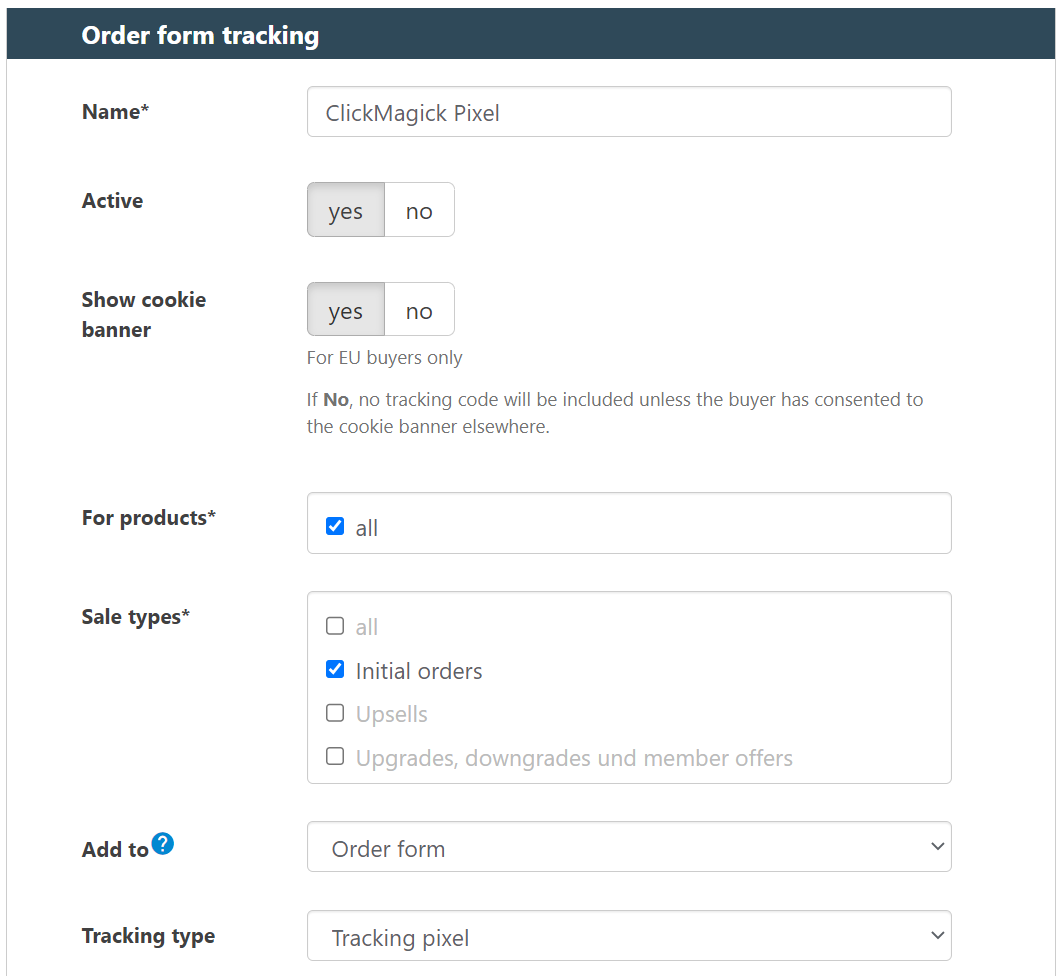
Give your pixel a name like ClickMagick Pixel, set "Active" to yes, in the "For products" section select All.
For Sales types, make sure "Initial orders" is the only option checked, Add to is set to “Order form”, and Tracking Type is set to "Tracking Pixel".
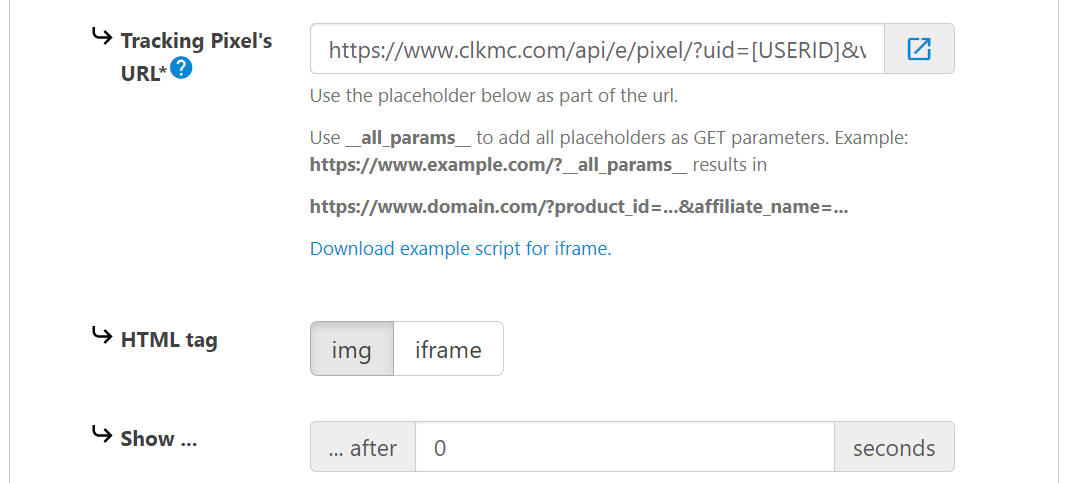
Add your Engagement Tracking Pixel URL into the box.
To do that, copy one of the URLs shown below:
If you are using ClickMagick Campaigns, you'll want to use the Engagement Pixel URL below:
https://www.clkmc.com/api/e/pixel/?uid=[USERID]&vid=__cid__&ref=checkoutIf you are using Tracking Links, you'll want to use the Engagement Pixel URL below:
https://www.clkmg.com/api/e/pixel/?uid=[USERID]Set HTML tag to img and Show after 0 seconds and then Save the page.
That's it!
You will now be able to track DigiStore24 Order Form Impressions as Engagements inside of ClickMagick.
Article 717 Last updated: 09/25/2024 11:02:02 AM
https://www.clickmagick.com/kb/?article=717